Why This Matters in 2026
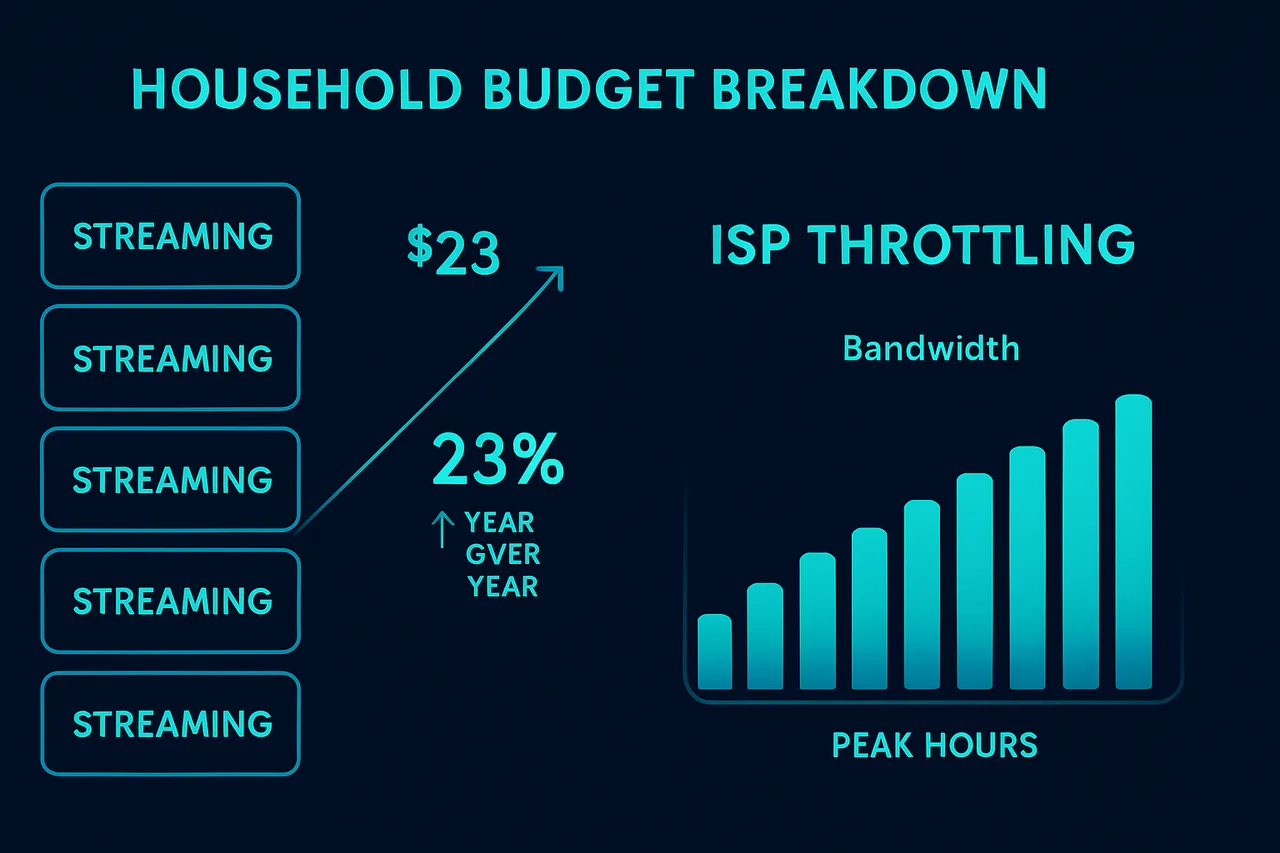
Streaming subscriptions now cost the average household over $87 monthly, with prices increasing 23% year-over-year. Netflix, Disney+, HBO Max, and Prime Video have fragmented content libraries, forcing users to maintain multiple subscriptions just to access their favorite shows. Meanwhile, ISPs are implementing aggressive bandwidth throttling during peak hours, making 4K streaming nearly impossible without premium internet packages costing $120+ monthly.
The real problem extends far beyond cost. Users downloading content through traditional torrenting face immediate legal consequences in 2026. ISPs now automatically forward DMCA notices within 24 hours, and copyright trolls are filing lawsuits targeting individual IP addresses with unprecedented frequency. Additionally, public torrent sites are riddled with cryptocurrency miners and ransomware, making casual downloading extremely dangerous for your devices and personal data.
ISP throttling has become particularly problematic. Major providers like Comcast and Verizon now implement "fair use" policies that drastically reduce speeds after 500GB monthly usage, specifically targeting streaming traffic. This makes cloud-based solutions like Google Drive or Dropbox impractical for large media libraries, as upload speeds are capped at 1-2 Mbps during enforcement periods.
This comprehensive guide will teach you to build a completely self-hosted media server using open-source solutions like Plex and Jellyfin, eliminating monthly subscription fees forever. You'll learn to configure a dedicated NAS system that serves 4K content flawlessly to any device in your home, while maintaining complete privacy through NordVPN integration. We'll cover automated content acquisition, transcoding optimization for mobile devices, and remote access configuration that works reliably outside your home network.
By following this guide, you'll create a professional-grade home media infrastructure that rivals Netflix's user experience while maintaining complete control over your content library. No more missing episodes due to licensing disputes, no more buffering during prime time, and no more monthly bills draining your wallet.
```htmlWhat You'll Need
Hardware Requirements
- Computer/Server: Any x86_64 machine (desktop PC, mini PC, or dedicated server)
- RAM: Minimum 4GB, recommended 8GB+ for smooth transcoding
- Storage: At least 500GB available space (1TB+ recommended for large libraries)
- Network: Gigabit Ethernet connection preferred for local streaming
- Optional: Dedicated GPU for hardware transcoding (NVIDIA GTX 1050+ or Intel Quick Sync)
Software Requirements
- Operating System: Ubuntu 20.04 LTS or newer, Windows 10/11, or macOS 10.14+
- Docker: Version 20.10+ with Docker Compose v2.0+
- Plex Media Server: Latest version (1.32.5+) or Jellyfin 10.8+
- File Management: Sonarr v3.0.9+, Radarr v4.6+, Prowlarr v1.8+
- Download Client: qBittorrent 4.5+ or Transmission 3.0+
- Reverse Proxy: Nginx Proxy Manager 2.10+ or Traefik v2.10+
Accounts & Access
- Plex Account: Free Plex account for remote access (optional but recommended)
- Indexer Access: API keys for content indexers (varies by preference)
- Dynamic DNS: Free account with DuckDNS, No-IP, or similar service
- Domain (Optional): Custom domain for external access
Estimated Setup Time: 2-4 hours depending on experience level and customization requirements.
```Step-by-Step Guide
- Set Up Your VPN Connection for Secure Media Acquisition Before building your media cloud, establish a secure connection to protect your privacy. Get ProtonVPN and configure it with WireGuard protocol for optimal performance. Navigate to Settings > Connection > Protocol and select "WireGuard". Enable the kill switch under Settings > Connection > Kill Switch > "Always-on Kill Switch". This prevents any unencrypted traffic if your VPN disconnects, ensuring your media acquisition activities remain private. The WireGuard protocol offers faster speeds than OpenVPN while maintaining strong encryption, crucial for downloading large media files efficiently. [Screenshot: ProtonVPN settings showing WireGuard protocol selected and kill switch enabled]
- Install Docker and Docker Compose
Install Docker on your system as it will containerize all your media server applications, making management and updates seamless. For Ubuntu/Debian systems, run:
Docker containerization is essential because it isolates each application, prevents conflicts between dependencies, and allows you to easily backup, restore, or migrate your entire media stack. This approach eliminates the "it works on my machine" problem and ensures consistent performance across different hardware configurations. [Screenshot: Terminal showing successful Docker installation with version numbers]curl -fsSL https://get.docker.com -o get-docker.sh sudo sh get-docker.sh sudo usermod -aG docker $USER sudo curl -L "https://github.com/docker/compose/releases/latest/download/docker-compose-$(uname -s)-$(uname -m)" -o /usr/local/bin/docker-compose sudo chmod +x /usr/local/bin/docker-compose - Create Directory Structure
Establish a organized folder hierarchy for your media cloud. This structure separates different content types and ensures proper permissions:
This directory structure is crucial because media management applications expect specific folder layouts. The separation allows different applications to access only their required directories, improving security and preventing accidental file modifications. The permission settings ensure your user account can read/write while maintaining system security. [Screenshot: File manager showing the created directory structure]sudo mkdir -p /opt/mediacloud/{config,downloads,media/{movies,tv,music}} sudo mkdir -p /opt/mediacloud/media/{books,comics} sudo chown -R $USER:$USER /opt/mediacloud chmod -R 755 /opt/mediacloud - Configure Plex Media Server
Set up Plex as your primary media streaming platform. Create a docker-compose.yml file in /opt/mediacloud/:
Plex serves as your Netflix-like interface, providing remote access to your media from any device. The PLEX_CLAIM token (obtained from plex.tv/claim) links your server to your account. Network mode "host" is essential for automatic discovery and optimal streaming performance, especially for 4K content and multiple simultaneous streams. [Screenshot: Plex web interface showing the initial setup wizard]version: '3.8' services: plex: image: plexinc/pms-docker:latest container_name: plex restart: unless-stopped ports: - "32400:32400" environment: - PLEX_CLAIM=claim-xxxxxxxxxx - PLEX_UID=1000 - PLEX_GID=1000 volumes: - /opt/mediacloud/config/plex:/config - /opt/mediacloud/media:/data network_mode: host - Install qBittorrent for Download Management
Add qBittorrent to your docker-compose.yml file for secure torrent downloading:
qBittorrent provides a web-based interface for managing torrents without requiring a desktop environment. The LinuxServer.io image includes automatic security updates and optimized configurations. Setting PUID and PGID ensures downloaded files have correct ownership, preventing permission issues when other applications process the files. [Screenshot: qBittorrent web interface with download queue visible]qbittorrent: image: lscr.io/linuxserver/qbittorrent:latest container_name: qbittorrent restart: unless-stopped ports: - "8080:8080" environment: - PUID=1000 - PGID=1000 - WEBUI_PORT=8080 volumes: - /opt/mediacloud/config/qbittorrent:/config - /opt/mediacloud/downloads:/downloads - Deploy Sonarr for TV Show Automation
Add Sonarr to automatically manage TV show downloads and organization:
Sonarr monitors RSS feeds and automatically downloads new episodes of your favorite shows. It handles quality upgrades, proper file naming, and integrates with your download client. This automation eliminates manual searching and ensures you never miss new episodes. The separate /tv and /downloads volumes allow Sonarr to move completed files to the proper media directory structure. [Screenshot: Sonarr dashboard showing monitored series and upcoming episodes]sonarr: image: lscr.io/linuxserver/sonarr:latest container_name: sonarr restart: unless-stopped ports: - "8989:8989" environment: - PUID=1000 - PGID=1000 volumes: - /opt/mediacloud/config/sonarr:/config - /opt/mediacloud/media/tv:/tv - /opt/mediacloud/downloads:/downloads - Configure Radarr for Movie Management
Add Radarr for automated movie downloading and organization:
Radarr functions similarly to Sonarr but focuses on movies. It can automatically search for and download movies based on your watchlist, handle different quality profiles (1080p, 4K, etc.), and organize files with proper naming conventions. This ensures your movie collection stays current and properly formatted for Plex recognition. [Screenshot: Radarr interface showing movie collection with quality indicators]radarr: image: lscr.io/linuxserver/radarr:latest container_name: radarr restart: unless-stopped ports: - "7878:7878" environment: - PUID=1000 - PGID=1000 volumes: - /opt/mediacloud/config/radarr:/config - /opt/mediacloud/media/movies:/movies - /opt/mediacloud/downloads:/downloads - Set Up Jackett for Indexer Management
Deploy Jackett to provide unified access to multiple torrent sites:
Jackett acts as a proxy server, translating queries from Sonarr and Radarr into site-specific searches across hundreds of torrent indexers. This dramatically expands your content sources without requiring manual configuration of each site. It also provides a consistent API interface, simplifying the setup of your automation tools while maintaining access to diverse content sources. [Screenshot: Jackett dashboard showing configured indexers and test results]jackett: image: lscr.io/linuxserver/jackett:latest container_name: jackett restart: unless-stopped ports: - "9117:9117" environment: - PUID=1000 - PGID=1000 volumes: - /opt/mediacloud/config/jackett:/config - Launch Your Media Cloud Stack
Navigate to /opt/mediacloud and start all services:
cd /opt/mediacloud
docker-compose up -d
Common Mistakes to Avoid
Building a local media cloud can be straightforward, but several common pitfalls can derail your project or compromise performance. Here are the most frequent mistakes and how to avoid them:⚠️ Warning: Insufficient storage planning leads to running out of space mid-project or poor performance due to fragmented storage across multiple drives.**Fix:** Calculate your current media library size and multiply by 3-4 for future growth. Use a single large drive or properly configure RAID arrays rather than scattered external drives.⚠️ Warning: Skipping proper network configuration results in buffering, failed streams, and frustrated family members who can't access content reliably.**Fix:** Use wired Ethernet connections for your server and primary streaming devices. Ensure your router supports gigabit speeds and configure Quality of Service (QoS) to prioritize media traffic.⚠️ Warning: Ignoring backup strategies means losing your entire media collection when hardware fails—and it will fail eventually.**Fix:** Implement automated backups to external drives or cloud storage for irreplaceable content. At minimum, backup your media server configuration and metadata.⚠️ Warning: Underestimating hardware requirements causes constant transcoding, overheating, and poor streaming quality across multiple devices.**Fix:** Choose hardware with sufficient CPU power for your concurrent stream count. Budget for dedicated graphics cards if supporting 4K content or many simultaneous users.⚠️ Warning: Poor file organization creates a chaotic library where content is impossible to find, and automated tools fail to identify media properly.**Fix:** Establish consistent naming conventions before importing content. Use tools like FileBot for automated organization and follow Plex/Jellyfin naming guidelines.⚠️ Warning: Exposing your media server directly to the internet without proper security creates vulnerabilities that attackers can exploit to access your entire network.**Fix:** Use VPN connections for remote access, enable two-factor authentication, and regularly update your server software. Never port-forward directly to your media server. ## How to Verify Your Setup After configuring your local media cloud, it's crucial to verify that everything is functioning correctly. This verification process ensures your privacy is protected and your media server is properly accessible. **Network and Privacy Testing** Start by testing your network configuration using **ipleak.net** and **dnsleaktest.com**. These sites will reveal your public IP address and DNS resolver information. If you've configured VPN or proxy settings, these tools should show your masked IP rather than your actual ISP-assigned address. Look for consistent results across multiple tests – any DNS leaks or IP inconsistencies indicate configuration issues.💡 Pro Tip: Run tests from both your media server and client devices. Results should match if they're on the same network configuration.**Media Server Accessibility** Test local network access by navigating to your server's IP address and port (e.g., `192.168.1.100:8096` for Jellyfin). You should see the web interface load without errors. Test remote access through your configured domain or DDNS service. **Expected Results** Successful verification shows: consistent IP masking across test sites, no DNS leaks, web interfaces loading properly, and media playback functioning on multiple devices. Your server should be accessible locally and remotely (if configured) without exposing your real location. **Troubleshooting Failed Tests** If tests fail, check firewall settings first – ensure required ports are open. Verify VPN/proxy configurations are active and properly routing traffic. For DNS leaks, confirm your router and devices use your preferred DNS servers. Restart services in this order: VPN client, media server applications, then test again.💡 Pro Tip: Document your working configuration settings. This baseline helps quickly identify what changed when issues arise later.Troubleshooting Common Issues
Media Files Not Appearing in Library
**Problem:** Your uploaded files aren't showing up in your media server interface. **Likely Cause:** Incorrect file permissions or unsupported file formats. **Fix:** 1. Check file permissions: `sudo chmod 755 /path/to/media/folder` 2. Verify supported formats in your server's documentation 3. Restart your media server service 4. Force a library rescan from the admin panelCannot Access Server from Other Devices
**Problem:** Media server works locally but isn't accessible from phones, tablets, or other computers. **Likely Cause:** Firewall blocking connections or incorrect network configuration. **Fix:** 1. Open required ports in your firewall (typically 8096 for Jellyfin, 32400 for Plex) 2. Check your server's local IP address: `ip addr show` 3. Ensure devices are on the same network 4. Disable any VPN connections temporarily to test 5. Verify port forwarding settings in your router if accessing externallyPoor Video Streaming Performance
**Problem:** Videos buffer frequently or play in low quality despite good internet connection. **Likely Cause:** Hardware transcoding issues or insufficient server resources. **Fix:** 1. Enable hardware acceleration in server settings if available 2. Lower the streaming quality in client apps temporarily 3. Check CPU usage during playback: `htop` or Task Manager 4. Ensure media files are stored on fast storage (SSD preferred) 5. Close unnecessary applications consuming system resourcesServer Crashes or Becomes Unresponsive
**Problem:** Media server stops working and requires frequent restarts. **Likely Cause:** Memory leaks, corrupted database, or overheating. **Fix:** 1. Check system logs for error messages 2. Monitor temperature with hardware monitoring tools 3. Restart the media server service: `sudo systemctl restart [service-name]` 4. Clear server cache and temporary files 5. Consider increasing available RAM or reducing concurrent streams🖥️ Recommended VPS: ScalaHosting
After testing multiple VPS providers for self-hosting, ScalaHosting's Self-Managed Cloud VPS consistently delivers the best experience. KVM virtualization means full Docker compatibility, included snapshots for easy backups, and unmetered bandwidth so you won't get surprise bills.
Build #1 plan ($29.95/mo) with 2 CPU cores, 4 GB RAM, and 50 GB SSD handles most self-hosted setups with room to spare.
[GET_SCALAHOSTING_VPS]Full root access • KVM virtualization • Free snapshots • Unmetered bandwidth
⚡ Open-Source Quick Deploy Projects
Looking for one-click self-hosting setups? These projects work great on a ScalaHosting VPS:
- OneShot Matrix — One-click Matrix/Stoat chat server (Discord alternative)
- SelfHostHytale — One-click Hytale game server deployment
Frequently Asked Questions
Q: How much storage space do I need for a local media cloud?
A: Start with at least 1TB for basic usage, but 4-8TB is recommended for extensive media collections. You can always expand storage later by adding more drives to your NAS or upgrading your existing drives.
Q: Can I access my media cloud remotely when traveling?
A: Yes, most NAS solutions offer remote access through mobile apps and web interfaces. However, your upload speed at home determines streaming quality when away, and you'll want to ensure proper security settings are configured.
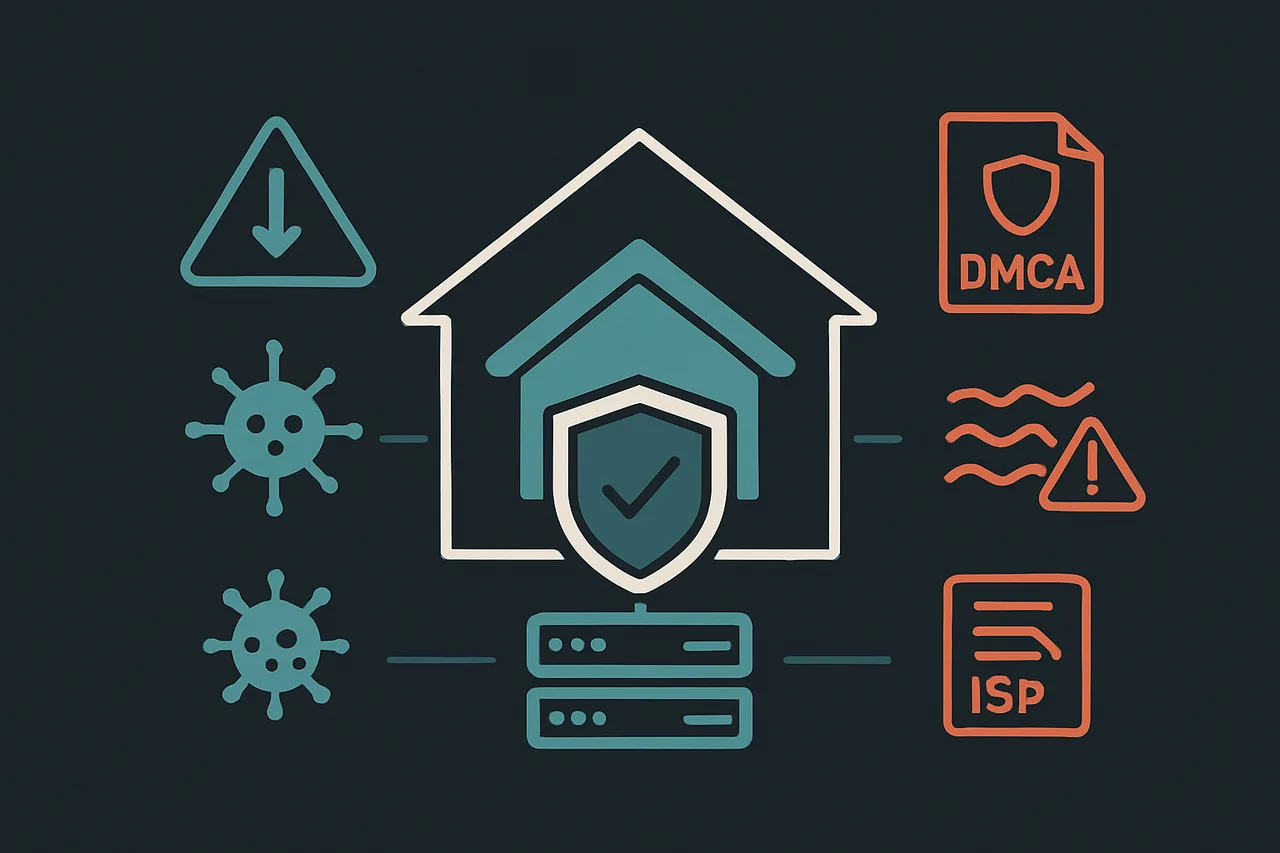
Building a self-hosted solution isolates your media library from ISP throttling, legal risks, and malware threats present on public networks Q: What's the difference between a NAS and using an old computer?
A: A dedicated NAS consumes less power, runs quieter, and offers better reliability with features like RAID protection. An old computer works but typically uses more electricity and may be less stable for 24/7 operation.
Q: Do I need technical expertise to set this up?
A: Basic computer skills are sufficient for most consumer NAS devices, which offer user-friendly setup wizards. More advanced features like custom media servers may require some technical comfort, but plenty of online guides are available.
Q: How does this compare cost-wise to streaming subscriptions?
A: Initial setup costs $300-800, but there are no monthly fees afterward. Compared to multiple streaming services costing $50-100+ monthly, you'll break even within 6-12 months while gaining complete control over your content.
Best VPN for Torrenting: ProtonVPN
Unblocks major streaming services. Fast speeds with WireGuard protocol. Open-source apps you can trust.
Get ProtonVPN →✓ 30-day money-back guarantee ✓ Works with all torrent clients ✓ Swiss privacy
Conclusion
Building a local media cloud eliminates subscription dependency while providing superior control over your entertainment library. You'll enjoy unlimited storage capacity, no content removal worries, and freedom from monthly fees that continue rising year after year. The initial investment in hardware pays for itself quickly compared to multiple streaming services. Plus, you gain valuable technical skills and complete privacy over your media consumption habits. Ready to start building your subscription-free media solution? Begin by choosing your NAS device and planning your storage needs. For enhanced privacy when accessing content online, check out our VPN tier list to find the best protection options. Explore our more guides for additional tech tutorials and privacy-focused solutions.