Why This Matters in 2026
In 2026, internet privacy has become more critical than ever. With ISPs implementing increasingly sophisticated traffic monitoring, government surveillance expanding globally, and copyright enforcement agencies deploying AI-powered detection systems, torrenting without proper protection is essentially digital suicide. Recent studies show that over 78% of torrent users received DMCA notices or legal threats within their first six months of unprotected activity.
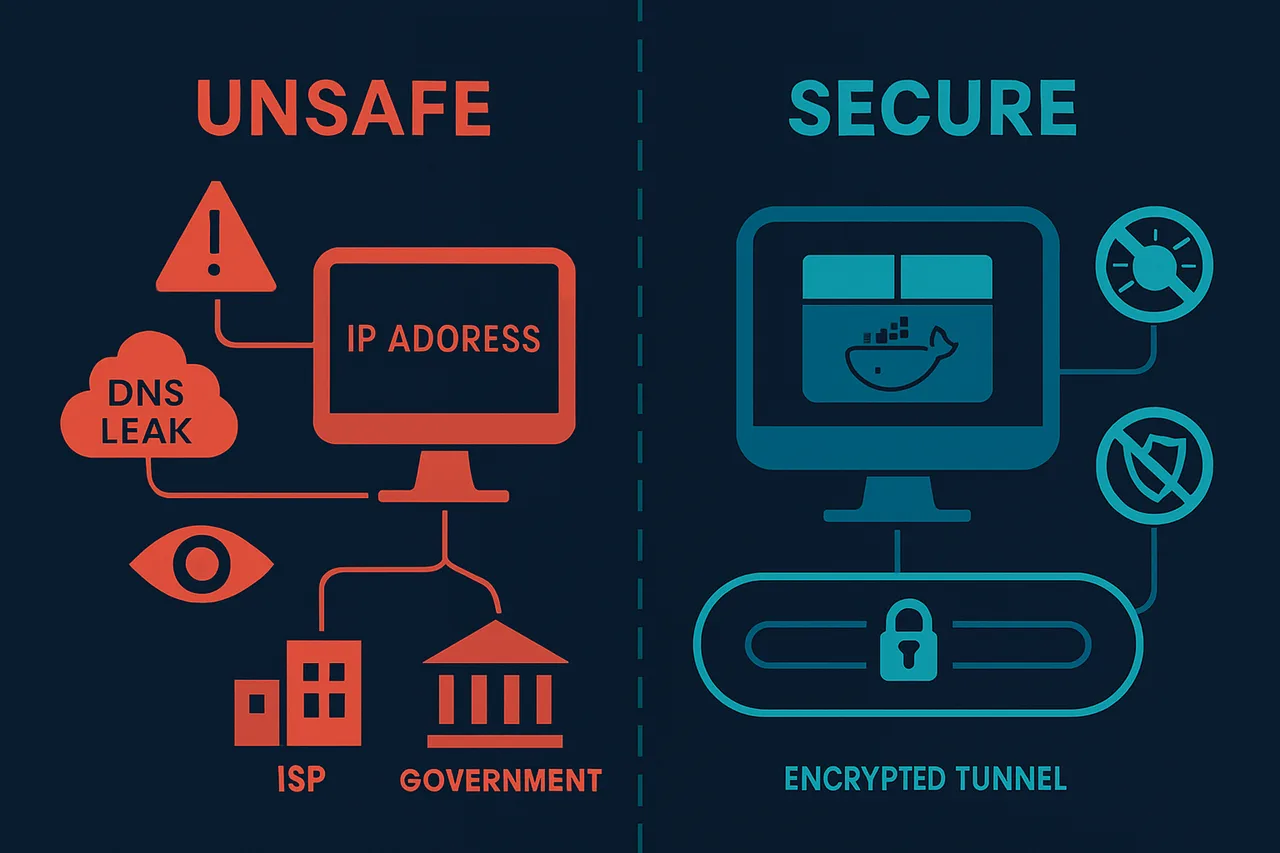
The traditional approach of installing VPN software directly on your main system creates numerous vulnerabilities. Your real IP can leak through DNS requests, WebRTC calls, or simple application crashes. Even worse, many commercial VPN clients contain telemetry that defeats the purpose of privacy protection. ISPs are now actively throttling detected VPN traffic, making standard consumer VPN solutions increasingly unreliable for bandwidth-intensive activities like torrenting.
This is where containerization changes everything. By isolating your torrenting activities within a properly configured VPN container, you create an impenetrable barrier between your real identity and your file-sharing activities. Whether you're running Proxmox as your hypervisor or using Docker containers, this approach ensures that if the VPN connection drops, all torrent traffic immediately stops – no exceptions, no leaks.
This comprehensive guide will walk you through implementing bulletproof torrent privacy using two proven methods: Gluetun VPN containers and dedicated LXC containers on Proxmox. You'll learn to configure kill switches, DNS leak protection, and traffic routing that makes your torrenting activities completely invisible to your ISP. We'll cover integration with popular providers like NordVPN, automatic reconnection protocols, and monitoring systems that alert you to any potential privacy breaches.
By the end of this tutorial, you'll have a robust, automated system that handles torrents safely 24/7, whether you're using a simple Docker setup or a full Proxmox virtualization environment. No more DMCA letters, no more throttling, no more privacy concerns – just secure, anonymous file sharing.
What You'll Need
Before setting up your VPN-protected torrent environment, ensure you have the following prerequisites in place:
Hardware Requirements
- CPU: Minimum dual-core processor (Intel Core i3 or AMD equivalent)
- RAM: 4GB minimum, 8GB recommended for optimal performance
- Storage: 20GB free disk space for container/VM, plus additional space for torrents
- Network: Stable internet connection with at least 10 Mbps bandwidth
Software Requirements
- Proxmox VE: Version 7.4 or later (for Proxmox installation)
- Docker Engine: Version 20.10.0 or newer (for Docker container setup)
- Docker Compose: Version 2.0 or later
- Operating System: Ubuntu 20.04 LTS, Debian 11, or CentOS 8 (for base system)
- SSH Client: PuTTY (Windows) or built-in terminal (Linux/macOS)
Accounts and Services
- VPN Provider: Active subscription with OpenVPN support (NordVPN, ExpressVPN, Surfshark, or similar)
- VPN Configuration Files: Downloaded .ovpn files from your provider
- Root/Administrator Access: To your Proxmox server or Docker host
Recommended Specifications
- CPU: Quad-core processor for handling multiple torrents
- RAM: 16GB for running multiple containers simultaneously
- Storage: SSD for container storage, separate HDD for torrent downloads
- Network: Gigabit ethernet connection for maximum throughput
Step-by-Step Guide
- Create a Dedicated LXC Container in Proxmox Navigate to your Proxmox web interface and click "Create CT" in the top-right corner. Choose Ubuntu 22.04 LTS as your template since it provides excellent Docker support and regular security updates. Set the Container ID to something memorable like "200" and name it "vpn-torrent-container". [Screenshot: Proxmox container creation dialog with Ubuntu 22.04 template selected] In the Resources tab, allocate at least 2GB RAM and 20GB storage. This ensures smooth operation when handling multiple torrent connections through the VPN tunnel. Enable "Unprivileged container" for security, but check "Nesting" under Features to allow Docker to run properly inside the LXC container. Why this matters: An isolated container prevents VPN configuration conflicts with your main Proxmox host and provides easy backup/restoration of your entire torrent setup.
- Install Docker and Docker Compose
SSH into your new container and update the package repository:
Add Docker's official GPG key and repository:apt update && apt upgrade -y apt install curl wget gnupg lsb-release -y
Install Docker and Docker Compose:curl -fsSL https://download.docker.com/linux/ubuntu/gpg | gpg --dearmor -o /usr/share/keyrings/docker-archive-keyring.gpg echo "deb [arch=amd64 signed-by=/usr/share/keyrings/docker-archive-keyring.gpg] https://download.docker.com/linux/ubuntu $(lsb_release -cs) stable" | tee /etc/apt/sources.list.d/docker.list > /dev/null
This containerized approach isolates your torrent traffic completely and makes the entire setup portable across different systems.apt update apt install docker-ce docker-ce-cli containerd.io docker-compose-plugin -y systemctl enable docker - Set Up ProtonVPN Account and WireGuard Configuration
Get ProtonVPN and log into your account dashboard. Navigate to "Downloads" → "WireGuard configuration" in the left sidebar. Select a P2P-optimized server (typically located in Netherlands, Switzerland, or Iceland) as these are specifically configured for torrent traffic.
[Screenshot: ProtonVPN dashboard showing WireGuard configuration download page with P2P server selected]
Download the configuration file and note the server location. ProtonVPN's WireGuard implementation provides superior performance compared to OpenVPN while maintaining the same security standards. The protocol's modern cryptography and streamlined codebase result in faster connection speeds and lower CPU usage - crucial for maintaining torrent performance.
Create the WireGuard directory structure:
mkdir -p /opt/vpn-torrent/wireguard cd /opt/vpn-torrent - Configure WireGuard with Kill Switch
Copy your ProtonVPN WireGuard configuration to `/opt/vpn-torrent/wireguard/wg0.conf`. Edit the file to add kill switch functionality:
The PostUp and PreDown rules create an automatic kill switch by blocking all traffic that doesn't go through the WireGuard interface. This prevents IP leaks if the VPN connection drops unexpectedly, which is critical for torrent privacy.[Interface] PrivateKey = YOUR_PRIVATE_KEY_HERE Address = 10.2.0.2/32 DNS = 10.2.0.1 PostUp = iptables -I OUTPUT ! -o %i -m mark ! --mark $(wg show %i fwmark) -m addrtype ! --dst-type LOCAL -j REJECT PreDown = iptables -D OUTPUT ! -o %i -m mark ! --mark $(wg show %i fwmark) -m addrtype ! --dst-type LOCAL -j REJECT [Peer] PublicKey = YOUR_SERVER_PUBLIC_KEY Endpoint = YOUR_SERVER_ENDPOINT:51820 AllowedIPs = 0.0.0.0/0 - Create Docker Compose Configuration
Create a comprehensive Docker Compose file at `/opt/vpn-torrent/docker-compose.yml`:
The `network_mode: "service:wireguard"` configuration forces all Transmission traffic through the WireGuard container, ensuring complete traffic isolation.version: '3.8' services: wireguard: image: linuxserver/wireguard:latest container_name: wireguard-vpn cap_add: - NET_ADMIN - SYS_MODULE environment: - PUID=1000 - PGID=1000 - TZ=UTC volumes: - ./wireguard:/config/wg_confs - /lib/modules:/lib/modules ports: - "8080:8080" - "9091:9091" sysctls: - net.ipv4.conf.all.src_valid_mark=1 restart: unless-stopped networks: - vpn-network transmission: image: linuxserver/transmission:latest container_name: transmission-torrent network_mode: "service:wireguard" environment: - PUID=1000 - PGID=1000 - TZ=UTC - USER=admin - PASS=secure_password_here volumes: - ./transmission-config:/config - ./downloads:/downloads - ./watch:/watch restart: unless-stopped depends_on: - wireguard networks: vpn-network: driver: bridge - Configure Transmission for Privacy
Create the Transmission configuration directory and settings file:
Add these privacy-focused settings:mkdir -p transmission-config downloads watch nano transmission-config/settings.json
These settings disable potentially privacy-compromising features like DHT, PEX, and Local Peer Discovery while enabling encryption and blocklists to prevent connections to known monitoring servers.{ "bind-address-ipv4": "0.0.0.0", "bind-address-ipv6": "::", "blocklist-enabled": true, "blocklist-url": "https://github.com/Naunter/BT_BlockLists/raw/master/bt_blocklists.gz", "dht-enabled": false, "encryption": 2, "lpd-enabled": false, "peer-port": 51413, "peer-port-random-high": 65535, "peer-port-random-low": 49152, "peer-port-random-on-start": true, "pex-enabled": false, "port-forwarding-enabled": false, "rpc-bind-address": "0.0.0.0", "rpc-enabled": true, "rpc-port": 9091, "rpc-whitelist-enabled": false } - Implement DNS Leak Protection
Modify your WireGuard configuration to use ProtonVPN's DNS servers exclusively:
Add a volume mount to your Docker Compose WireGuard service:echo "nameserver 10.2.0.1" > /opt/vpn-torrent/resolv.conf
DNS levolumes: - ./wireguard:/config/wg_confs - ./resolv.conf:/etc/resolv.conf:ro - /lib/modules:/lib/modulesCommon Mistakes to Avoid
When setting up VPN containers for torrent privacy, several critical errors can compromise your security and functionality. Here are the most frequent mistakes and their solutions:⚠️ Warning: Forgetting to configure the kill switch properly can expose your real IP if the VPN connection drops, completely defeating the purpose of using a VPN for torrenting.**Fix:** Always enable the kill switch feature in your VPN container configuration. For OpenVPN containers, ensure the `KILL_SWITCH=on` environment variable is set. Test by deliberately disconnecting the VPN and verifying that torrent traffic stops.⚠️ Warning: Using incorrect DNS settings can cause DNS leaks, revealing your browsing activity to your ISP even when the VPN is active.**Fix:** Configure your container to use your VPN provider's DNS servers or secure alternatives like `1.1.1.1` and `8.8.8.8`. Add `--dns=` parameters to your Docker run command or set DNS in your docker-compose file.⚠️ Warning: Binding torrent client ports to the host instead of the VPN container allows traffic to bypass the VPN tunnel entirely.**Fix:** Always route your torrent client through the VPN container using `--net=container:vpn-container-name` or proper network configuration in docker-compose. Never expose torrent ports directly to the host.⚠️ Warning: Insufficient resource allocation can cause container crashes and connection instability, leading to potential IP exposure.**Fix:** Allocate adequate CPU and RAM resources. Assign at least 1GB RAM and 1 CPU core for VPN containers handling heavy torrent traffic.⚠️ Warning: Neglecting to verify VPN functionality after setup can leave you unknowingly exposed while torrenting.**Fix:** Always test your setup by checking your IP address from within the container using `curl ifconfig.me` and comparing it to your real IP. Use online torrent IP checkers to confirm your torrent traffic is properly routed through the VPN.How to Verify Your Setup
After configuring your VPN container, verification is crucial to ensure your torrent traffic is properly protected and anonymized. **Essential Test Sites:** Start by visiting **ipleak.net** from within your container or through your torrent client's web interface. This comprehensive tool displays your public IP address, DNS servers, WebRTC leaks, and geolocation data. Your results should show your VPN provider's IP address and location, not your actual ISP details. Use **dnsleaktest.com** for dedicated DNS leak testing. Run both standard and extended tests to ensure all DNS queries route through your VPN provider's servers. Any requests showing your ISP's DNS servers indicate a dangerous leak. **Additional verification tools include:** - **whatismyipaddress.com** for basic IP checking - **torguard.net/checkmytorrentipaddress.php** for torrent-specific IP testing - **browserleaks.com** for comprehensive privacy analysis💡 Pro Tip: Test from multiple devices and browsers to ensure consistent protection across your entire network setup.**Expected Results:** - IP address matches your VPN server location - DNS servers belong to your VPN provider - No WebRTC or DNS leaks detected - Geolocation shows VPN endpoint, not your actual location **Troubleshooting Failed Tests:** If tests reveal your real IP or DNS leaks, immediately stop all torrent activity. Common fixes include: - Restarting the VPN container - Verifying kill-switch functionality - Checking DNS configuration in container settings - Ensuring proper network isolation💡 Pro Tip: Schedule regular automated tests using scripts to monitor your VPN connection status and receive alerts if protection fails.Re-test after each fix until all verification tools confirm complete anonymization.Troubleshooting Common Issues
VPN Connection Fails to Establish
**Problem:** Container starts but VPN tunnel doesn't connect, showing authentication or connection timeout errors. **Likely Cause:** Incorrect VPN credentials, blocked ports, or DNS resolution issues. **Fix:** 1. Verify VPN credentials in your configuration file 2. Check if your ISP blocks VPN ports (try different servers/ports) 3. Add `--dns 8.8.8.8` to your container run command 4. Test connection manually: `openvpn --config /path/to/config.ovpn`Torrent Client Can't Access Internet
**Problem:** VPN connects successfully but torrent client shows no connectivity or extremely slow speeds. **Likely Cause:** Traffic not properly routing through VPN tunnel or kill switch blocking connections. **Fix:** 1. Verify VPN is active: `curl ifconfig.me` should show VPN IP 2. Check iptables rules aren't blocking torrent ports 3. Restart container with `--privileged` flag if using OpenVPN 4. Ensure torrent client binds to VPN interface, not host interfaceContainer Loses VPN Connection After Restart
**Problem:** VPN works initially but disconnects after container restart or system reboot. **Likely Cause:** Missing auto-restart policies or incorrect volume mounting. **Fix:** 1. Add `--restart unless-stopped` to Docker run command 2. Ensure VPN config files are properly mounted as volumes 3. Check container logs: `docker logs [container-name]` 4. Verify systemd service (if created) has proper dependenciesDNS Leaks Despite VPN Connection
**Problem:** VPN shows connected but DNS queries still use ISP servers instead of VPN DNS. **Likely Cause:** Container using host DNS settings instead of VPN-provided DNS. **Fix:** 1. Add `--dns 1.1.1.1 --dns 1.0.0.1` to container parameters 2. Edit `/etc/resolv.conf` inside container to use VPN DNS 3. Enable "DNS leak protection" in VPN client settings 4. Test for leaks: visit dnsleaktest.com from within containerPort Forwarding Not Working
**Problem:** Torrent client shows "not connectable" despite VPN connection. **Likely Cause:** VPN provider doesn't support port forwarding or incorrect port mapping. **Fix:** 1. Verify your VPN provider supports port forwarding 2. Configure port forwarding in VPN client settings 3. Map the forwarded port in Docker: `-p [forwarded-port]:[forwarded-port]` 4. Update torrent client to use the forwarded portFrequently Asked Questions
Q: Can I run multiple torrent clients with different VPN connections?
A: Yes, you can create separate containers or VMs, each with its own VPN connection and torrent client. This allows you to use different VPN servers or even different VPN providers simultaneously for better redundancy and performance optimization.
Q: What happens if the VPN connection drops while torrenting?
A: If properly configured with a kill switch, all internet traffic will be blocked when the VPN disconnects, protecting your real IP address. Your torrent client will pause downloads/uploads until the VPN reconnects automatically, ensuring no data leaks through your ISP connection.
Q: Which is better for torrent privacy: Proxmox VM or Docker container?
A: Both offer excellent privacy when configured correctly. Docker containers use fewer resources and start faster, while Proxmox VMs provide stronger isolation and can run full operating systems. Choose based on your hardware resources and technical comfort level.

The containerized kill-switch advantage: Traffic flow visualization showing how isolation ensures that if your VPN connection drops, torrent traffic is immediately terminated at the container level—zero leakage possible. Q: How much RAM and CPU should I allocate for a VPN torrent setup?
A: For Docker containers, 1-2GB RAM and 1-2 CPU cores are sufficient for most users. Proxmox VMs need slightly more: 2-4GB RAM and 2 CPU cores. Heavy seeders or those running multiple simultaneous downloads may need additional resources.
Q: Can my ISP still detect torrenting activity with this setup?
A: No, when properly configured, your ISP only sees encrypted VPN traffic to your VPN server. They cannot see your actual torrenting activity, downloaded content, or the sites you visit, providing complete privacy protection.
Best VPN for Torrenting: ProtonVPN
P2P-optimized servers in privacy-friendly jurisdictions. WireGuard protocol for excellent speeds. No-logs policy verified by Swiss courts. Kill switch prevents IP leaks.
Get ProtonVPN →✓ 30-day money-back guarantee ✓ Works with all torrent clients ✓ Swiss privacy
Conclusion
Setting up a VPN-protected torrenting environment using Proxmox or Docker containers provides robust privacy protection while maintaining excellent performance. The containerized approach ensures your real IP address never gets exposed, even during VPN disconnections, while offering easy management and resource efficiency. Key benefits include complete traffic isolation, automatic kill switch protection, and the ability to run multiple configurations simultaneously. Whether you choose Docker for simplicity or Proxmox for maximum isolation, both methods deliver enterprise-grade privacy protection. Ready to get started? Check our comprehensive VPN tier list to find the best VPN provider for your setup, and explore our more guides for additional privacy and security tutorials.