Why This Matters in 2026
In 2026, the digital landscape has become increasingly hostile to media enthusiasts. Major streaming platforms have fragmented content across dozens of services, each demanding $15-20 monthly subscriptions while simultaneously removing beloved shows without notice. Meanwhile, ISPs have ramped up their surveillance efforts, sending DMCA notices for even legitimate media sharing and implementing aggressive throttling on suspected streaming traffic.
The real problem isn't just cost—it's control and privacy. Users are facing a perfect storm of issues: ISP letters arriving for family movie nights, bandwidth throttling that makes 4K streaming impossible during peak hours, and malware-riddled streaming sites that compromise entire home networks. Legal gray areas have expanded as copyright holders deploy increasingly aggressive automated detection systems that flag legitimate personal media libraries.
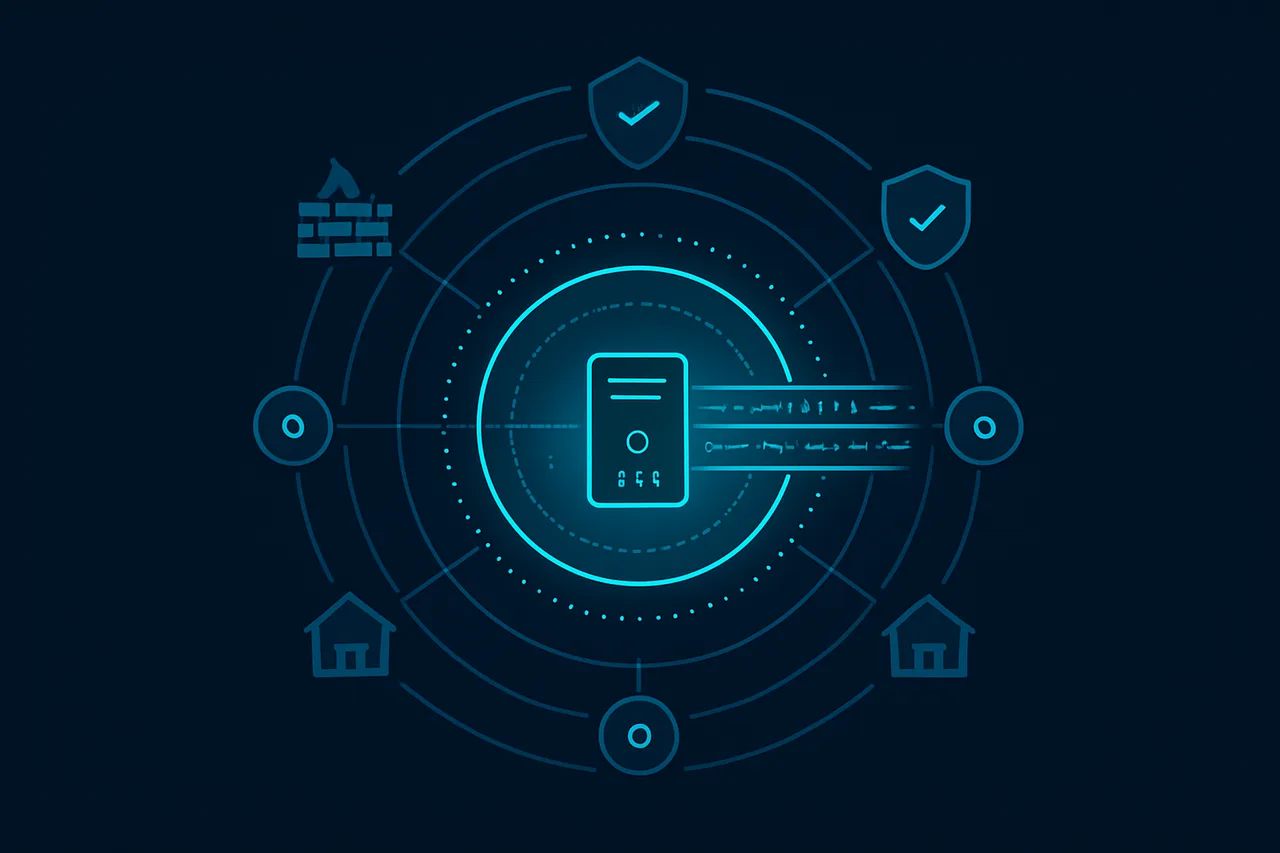
This is where Jellyfin becomes your digital sanctuary. Unlike proprietary alternatives, this open-source media server puts you back in control of your entertainment ecosystem while maintaining bulletproof privacy practices.

This comprehensive guide will teach you to build a privacy-hardened Jellyfin home server that operates completely under the radar. You'll learn to configure enterprise-grade VPN tunneling with NordVPN integration, implement DNS filtering to prevent media fingerprinting, and establish secure remote access that won't trigger ISP monitoring algorithms. We'll cover advanced techniques like traffic obfuscation, automated media organization with privacy-preserving metadata scraping, and multi-user access controls that maintain operational security.
Beyond basic setup, you'll master critical privacy fundamentals: configuring kill switches that protect your identity if VPN connections drop, implementing proper firewall rules that prevent media server discovery, and establishing secure backup strategies that won't expose your library to cloud surveillance.
By the end of this guide, you'll operate a completely private streaming ecosystem that delivers Netflix-quality experiences while remaining invisible to ISP monitoring, copyright trolls, and data harvesting operations.
What You'll Need
Before setting up your privacy-focused Jellyfin media server, ensure you have the following prerequisites in place:
Hardware Requirements
- Minimum: 2GB RAM, dual-core CPU (Intel Core i3 or AMD equivalent), 20GB storage
- Recommended: 8GB RAM, quad-core CPU (Intel Core i5-8400 or AMD Ryzen 5 2600), 1TB+ storage
- For 4K transcoding: Intel CPU with Quick Sync (8th gen+) or dedicated GPU with hardware encoding
- Reliable internet connection (minimum 10 Mbps upload for remote streaming)
Software Requirements
- Operating System: Ubuntu 22.04 LTS, Debian 12, Windows 10/11, or macOS 12+
- Jellyfin Server: Version 10.9.0 or later (latest stable recommended)
- Docker: Version 24.0+ and Docker Compose V2 (for containerized setup)
- VPN Client: WireGuard, OpenVPN, or similar for enhanced privacy
- Reverse Proxy: Nginx 1.24+ or Caddy 2.7+ (for secure external access)
Additional Tools & Accounts
- Domain registrar account (Cloudflare, Namecheap) for custom domain setup
- Let's Encrypt compatible ACME client (Certbot 2.0+)
- Media management: Sonarr 4.0+, Radarr 5.0+, Prowlarr 1.0+ (optional but recommended)
- Firewall software: UFW (Linux) or Windows Defender Firewall configured
- SSH client for remote server management
Note: This guide prioritizes privacy and security, requiring additional configuration steps beyond a basic Jellyfin installation.
Step-by-Step Guide
- Secure Your Network Connection with VPN Before beginning the Jellyfin installation, establish a secure connection to protect your privacy from your ISP and potential surveillance. Get ProtonVPN and configure it with WireGuard protocol for optimal performance and security. Navigate to ProtonVPN Settings > Connection > Protocol and select "WireGuard". Enable the Kill Switch feature under Settings > Advanced > Kill Switch to ensure your real IP never leaks if the VPN disconnects. This prevents any Jellyfin traffic from being exposed to your ISP, which is crucial since media streaming can trigger DMCA monitoring. [Screenshot: ProtonVPN WireGuard protocol selected with Kill Switch enabled]
- Download and Install Jellyfin Server
Visit jellyfin.org/downloads and select your operating system. For maximum privacy, avoid the Microsoft Store or Snap packages as they may include telemetry. Download the direct installer or use the official repositories.
For Ubuntu/Debian systems, add the official repository:
For Windows, download the installer directly. During installation, uncheck "Send anonymous usage statistics" and "Check for updates automatically" to prevent any data collection or external connections that could compromise your privacy. [Screenshot: Jellyfin installer with telemetry options unchecked]curl https://repo.jellyfin.org/install-debuntu.sh | sudo bash - Configure Initial Privacy Settings Access the Jellyfin web interface at localhost:8096. During the initial setup wizard, create your administrator account with a strong, unique password. When prompted for network settings, select "Allow connections from localhost only" initially - you'll configure remote access securely later. Skip the "Connect to Jellyfin Online Services" step entirely. This prevents Jellyfin from contacting external metadata services that could log your IP address and viewing habits. You'll configure private metadata sources in the next steps. [Screenshot: Network settings showing localhost-only configuration selected]
- Disable All External Communications
Navigate to Dashboard > General > Networking. Set the following privacy-focused configurations:
Go to Dashboard > General > Updates and disable:Enable automatic port mapping = False Enable published server URIs = False Enable metrics collection = False Enable remote connections = False (temporarily)
These settings prevent Jellyfin from making any unauthorized external connections that could expose your server's existence or your media library contents to third parties. [Screenshot: Networking settings with all external communications disabled]Enable automatic updates = False Enable update notifications = False - Configure Private Metadata Sources
In Dashboard > Libraries > Metadata, disable all default metadata providers that require internet connections. Instead, configure local metadata sources:
For enhanced privacy while maintaining functionality, you can optionally route metadata requests through your VPN by enabling specific providers, but only after confirming your VPN connection is stable. This prevents metadata services from associating your real IP with your media library contents. [Screenshot: Metadata settings showing local-only providers selected]Movie metadata providers = Local only TV metadata providers = Local only Music metadata providers = Local only Image fetchers = Local only - Set Up Secure Media Library Paths
Create your media directories outside of system folders to avoid potential permission issues and logging. Recommended structure:
In Dashboard > Libraries, add your libraries using these paths. Under Advanced settings for each library, disable:/home/jellyfin/media/movies /home/jellyfin/media/tv /home/jellyfin/media/music
Real-time monitoring can create system logs that record file access patterns, while disabling chapter image extraction reduces the forensic footprint of your media consumption. [Screenshot: Library settings with privacy options configured]Enable real time monitoring = False Extract chapter images = False (reduces disk forensics) Save local metadata = True (keeps data self-contained) - Configure User Privacy Settings
For each user account, navigate to Dashboard > Users > [Username] > Profile. Configure these privacy-enhancing settings:
Under Playback settings, disable:Save login information = False Enable activity logging = False Allow media downloads = True (for offline viewing) Force transcoding = False (reduces server logs)
These settings prevent Jellyfin from creating detailed logs of viewing habits, which could be problematic if your server is ever compromised or legally examined. [Screenshot: User profile settings with activity logging disabled]Report playback progress = False Remember audio and subtitle selections = False - Implement Secure Remote Access
Instead of opening ports directly, set up a WireGuard VPN server on your network for secure remote access. Install WireGuard on your Jellyfin server:
Configure the WireGuard server to only allow connections to your Jellyfin port (8096) and DNS. This creates an encrypted tunnel that prevents ISP monitoring of your remote streaming and protects against man-in-the-middle attacks on public networks. Alternatively, use Tailscale for easier setup while maintaining privacy, as it creates peer-to-peer encrypted connections without routing through external servers. [Screenshot: WireGuard configuration file with Jellyfin-specific routing]sudo apt install wireguard wg genkey | tee privatekey | wg pubkey > publickey - Configure Logging and Cleanup Policies
Navigate to Dashboard > General > Logs and configure minimal logging:
Set up automatic log cleanup by creating a cron job:Log file retention days = 1 Enable debug logging = False Log level = Error only
This ensures that detailed usage logs don't accumulate on your system, reducing the digital footprint of your media consumption patterns while maintaining essential error information for troubleshooting. [Screenshot: Logging settings configured for minimal retention]0 2 * * * find /var/log/jellyfin -name "*.log" -mtime +1 -delete - Enable Hardware Acceleration Privately
If using hardware acceleration for transcoding, configure it to avoid cloud-based processing. Go to Dashboard > Playback > Transcoding and select local hardware options only:
Avoid any "cloud transcoding" or "remote processing" options that might send your media to external servers. Local hardware acceleration provides performance benefits while keeping all processing on your private server. [Screenshot: Transcoding settings showing local hardware acceleration enabled]Hardware acceleration = VAAPI/NVENC (local only) Enable hardware encoding = True Enable tone mapping = True Hardware decoding = All formats supported - Verify Privacy Configuration
Perform a final privacy audit by monitoring network connections while Jellyfin runs. Use netstat or ss to verify no unexpected external connections:
Check that Jellyfin only listens on localhost (127.0.0.1:8096) or your VPN interface. Test your setup by accessing Jellyfin through your VPN connection and confirming that all features work without any external metadata or update requests being made. Document your configuration and create regular backups of your Jellyfin settings to maintain your privacy setup long-term. [Screenshot: Network monitoring showing only local and VPN connections active]ss -tuln | grep :8096 netstat -an | grep ESTABLISHED
Common Mistakes to Avoid
Setting up Jellyfin with privacy in mind requires attention to detail. Here are the most frequent mistakes that can compromise your setup's security, performance, or privacy protection.
⚠️ Warning: Using default admin credentials exposes your server to unauthorized access and potential data breaches.
**Fix:** Immediately change the default username and create a strong password during initial setup. Enable two-factor authentication if available through plugins.
⚠️ Warning: Exposing Jellyfin directly to the internet without reverse proxy protection makes your server vulnerable to attacks and reveals your real IP address.
**Fix:** Always use a reverse proxy like Nginx or Caddy with SSL certificates. Configure proper firewall rules and consider using a VPN for external access.
⚠️ Warning: Enabling automatic metadata fetching from online databases leaks your media library contents to third-party services.
**Fix:** Disable automatic metadata fetching in Library settings. Use local metadata files (.nfo) or manually curate metadata to maintain privacy.
⚠️ Warning: Running Jellyfin with root privileges creates unnecessary security risks and violates the principle of least privilege.
**Fix:** Create a dedicated jellyfin user account with minimal permissions. Configure proper file ownership and group permissions for media directories.
⚠️ Warning: Skipping regular backups of configuration and database files can result in complete setup loss during system failures.
**Fix:** Implement automated backups of the `/config` directory and database files. Test restoration procedures regularly.
⚠️ Warning: Installing untrusted plugins from unofficial sources can introduce malware or compromise server security.
**Fix:** Only install plugins from the official Jellyfin repository. Review plugin permissions and source code when possible before installation.
## How to Verify Your Setup
Once your Jellyfin server is configured with privacy protections, it's crucial to verify everything is working correctly. Follow these verification steps to ensure your setup maintains anonymity and security.
### Network Privacy Testing
Start by testing your server's network footprint using these reliable verification sites:
**ipleak.net** - Navigate to this site from your Jellyfin server to check for IP leaks. You should see your VPN server's IP address, not your real location. The DNS servers listed should match your VPN provider's DNS or your custom DNS configuration.
**dnsleaktest.com** - Run both standard and extended tests. All DNS queries should route through your chosen privacy-focused DNS servers (like Quad9 or Cloudflare) rather than your ISP's servers.
**browserleaks.com/webrtc** - Verify WebRTC isn't exposing your real IP address if you're accessing Jellyfin through web browsers.
💡 Pro Tip: Run these tests both from your server machine and from client devices accessing Jellyfin to ensure end-to-end privacy protection.
### Expected Results
Your tests should show:
- VPN server IP instead of your real IP
- DNS queries resolving through privacy-focused servers
- No IPv6 leaks (unless intentionally configured)
- Consistent geolocation matching your VPN endpoint
### Troubleshooting Failed Tests
If tests reveal your real IP or DNS leaks:
1. **Restart your VPN connection** and verify the kill switch is active
2. **Check firewall rules** to ensure traffic only flows through VPN tunnels
3. **Disable IPv6** if you're not using a VPN that supports it
4. **Verify DNS settings** in both your system and Jellyfin configuration
💡 Pro Tip: Set up automated monitoring scripts to periodically check these verification sites and alert you if your privacy protection fails.
Troubleshooting Common Issues
Server Not Accessible from Other Devices
**Problem:** Jellyfin works locally but can't be reached from other devices on your network. **Likely Cause:** Firewall blocking connections or incorrect network binding. **Fix:** 1. Open firewall port 8096: `sudo ufw allow 8096` 2. In Jellyfin Dashboard > Networking, set "Local network addresses" to your server's IP range (e.g., 192.168.1.0/24) 3. Ensure "Enable automatic port mapping" is disabled for privacy 4. Restart Jellyfin service: `sudo systemctl restart jellyfin`Media Files Not Scanning or Missing
**Problem:** Added media folders appear empty or don't update with new content. **Likely Cause:** Permission issues or incorrect folder structure. **Fix:** 1. Set proper ownership: `sudo chown -R jellyfin:jellyfin /path/to/media` 2. Set permissions: `sudo chmod -R 755 /path/to/media` 3. Verify folder structure follows naming conventions (Movie Name (Year)/Movie.mkv) 4. Trigger manual scan in Dashboard > Libraries > [Library Name] > Scan LibraryTranscoding Fails or Poor Performance
**Problem:** Videos buffer constantly or fail to play on certain devices. **Likely Cause:** Hardware acceleration disabled or insufficient server resources. **Fix:** 1. Navigate to Dashboard > Playback > Transcoding 2. Enable hardware acceleration (VAAPI for Intel, NVENC for NVIDIA) 3. Add jellyfin user to render group: `sudo usermod -a -G render jellyfin` 4. Lower transcoding quality settings if hardware is limited 5. Restart Jellyfin serviceHTTPS/SSL Certificate Errors
**Problem:** Browser shows security warnings when accessing Jellyfin. **Likely Cause:** Self-signed certificate or expired SSL certificate. **Fix:** 1. Generate new certificate: `openssl req -x509 -newkey rsa:4096 -keyout key.pem -out cert.pem -days 365` 2. Place certificates in `/etc/jellyfin/ssl/` 3. Update Dashboard > Networking > HTTPS settings with certificate paths 4. Restart Jellyfin and clear browser cache🖥️ Recommended VPS: ScalaHosting
After testing multiple VPS providers for self-hosting, ScalaHosting's Self-Managed Cloud VPS consistently delivers the best experience. KVM virtualization means full Docker compatibility, included snapshots for easy backups, and unmetered bandwidth so you won't get surprise bills.
Build #1 plan ($29.95/mo) with 2 CPU cores, 4 GB RAM, and 50 GB SSD handles most self-hosted setups with room to spare.
[GET_SCALAHOSTING_VPS]Full root access • KVM virtualization • Free snapshots • Unmetered bandwidth
⚡ Open-Source Quick Deploy Projects
Looking for one-click self-hosting setups? These projects work great on a ScalaHosting VPS:
- OneShot Matrix — One-click Matrix/Stoat chat server (Discord alternative)
- SelfHostHytale — One-click Hytale game server deployment
Frequently Asked Questions
Q: Can I access my Jellyfin server remotely without exposing my home IP address?
A: Yes, using a VPN is the most secure method for remote access. Set up a VPN server on your network or use a privacy-focused VPN service with port forwarding capabilities. This encrypts your connection and masks your real IP address from potential threats.
Q: How much storage space do I need for a personal media server?
A: Storage requirements depend on your media collection size and quality preferences. A typical movie in 1080p takes 2-8GB, while 4K movies can use 15-50GB each. Start with at least 1TB and plan to expand as your library grows. Consider using external drives for scalability.
Q: Is it legal to run a Jellyfin server with my personal media collection?
A: Yes, hosting your legally obtained media (purchased DVDs, Blu-rays, or digital downloads) on a personal server is legal in most jurisdictions. However, sharing copyrighted content you don't own or accessing pirated material remains illegal. Always respect copyright laws in your region.
Q: What are the minimum hardware requirements for smooth 4K streaming?
A: For 4K streaming, you need a CPU with hardware transcoding support (Intel Quick Sync, AMD VCE, or NVIDIA NVENC) and at least 8GB RAM. A dedicated GPU significantly improves performance. Ensure your network can handle 25-40 Mbps bandwidth for direct play of 4K content.
Q: How do I secure my Jellyfin server from unauthorized access?
A: Enable strong authentication, use HTTPS certificates, regularly update Jellyfin, and avoid exposing your server directly to the internet. Implement firewall rules, use VPN access, and monitor login attempts. Consider setting up fail2ban to automatically block suspicious IP addresses.
Best VPN for Torrenting: ProtonVPN
Unblocks major Streaming Services. Fast speeds with WireGuard protocol. Open-source apps you can trust.
Get ProtonVPN →✓ 30-day money-back guarantee ✓ Works with all torrent clients ✓ Swiss privacy