Self-Hosted VPN Server: Complete Setup Guide for Maximum Privacy and Control
TL;DR: Self-hosting your VPN provides complete control over your data and eliminates third-party trust issues, but requires technical expertise and ongoing maintenance. This guide walks you through setting up WireGuard with Docker, securing it with proper firewall rules, and implementing monitoring - typically taking 2-3 hours for a complete setup that costs $5-15/month versus $60-120/year for commercial providers.
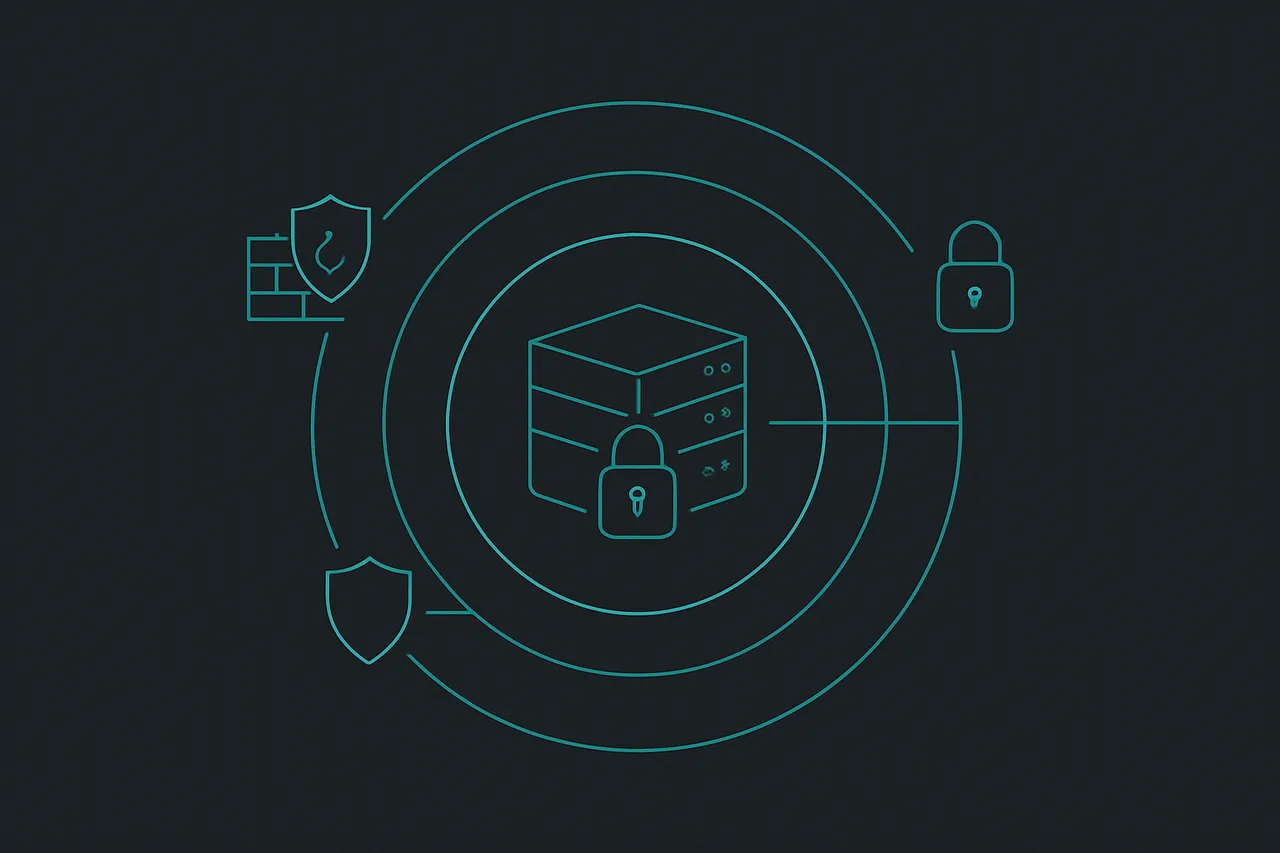
Why This Matters
The VPN industry has exploded with providers making bold privacy claims, but recent investigations have revealed that many commercial VPN services log user data, suffer from DNS leaks, or operate under questionable jurisdictions. When you self-host your VPN server, you eliminate the fundamental trust problem inherent in commercial VPN services - you're no longer relying on a third party's promise to protect your privacy. Self-hosting also provides technical advantages that commercial providers simply cannot match. You have complete control over the server configuration, can implement custom security policies, choose your exact geographic location, and avoid the performance degradation that comes from sharing servers with thousands of other users. Many commercial VPN services oversell their server capacity, leading to inconsistent speeds and connection reliability issues during peak hours. From a cost perspective, the economics often favor self-hosting for long-term users. While commercial VPN services typically cost $60-120 annually, a VPS suitable for personal VPN use costs $60-180 per year, but provides dedicated resources and can host additional services. The break-even point usually occurs within 12-18 months, after which you're saving money while gaining superior performance and privacy. The learning experience itself is invaluable for anyone interested in networking, security, or system administration. Setting up your own VPN server teaches you about modern cryptographic protocols, network routing, firewall configuration, and server management - skills that are increasingly important in our connected world. Unlike following a tutorial for a commercial service, self-hosting builds genuine technical competency. However, self-hosting isn't for everyone. It requires ongoing maintenance, security updates, and troubleshooting when issues arise. You're responsible for server uptime, security patches, and backup procedures. For users who simply want to bypass geo-restrictions or add basic privacy protection without technical involvement, commercial providers may still be the better choice.What You'll Need
Before diving into the setup process, you'll need several key components to build a robust self-hosted VPN solution. The most critical requirement is a Virtual Private Server (VPS) with specific characteristics that ensure both performance and privacy. I recommend providers like Vultr, DigitalOcean, or Linode, which offer transparent privacy policies and don't require extensive personal verification. Your VPS should have at least 1GB RAM, 25GB storage, and unlimited bandwidth - typically costing $5-10 monthly. The geographic location of your VPS is crucial and depends on your specific use case. If you're primarily concerned with privacy from your ISP, choose a server in a privacy-friendly jurisdiction like Switzerland, Iceland, or the Netherlands. For bypassing geo-restrictions, select a location where your desired content is available. Consider network latency as well - a server 1000+ miles away will add 20-50ms to your connection, which is noticeable for real-time applications like gaming or video calls. Your domain name setup requires careful consideration for both security and functionality. While you can use an IP address directly, a domain name provides flexibility and easier certificate management. I recommend using a separate domain specifically for your VPN infrastructure rather than a subdomain of your main website. Services like Cloudflare provide free DNS management with privacy protection, though you should disable their proxy service for VPN endpoints to avoid routing conflicts. From a software perspective, you'll need a modern Linux distribution - I strongly recommend Ubuntu 22.04 LTS or Debian 11 for their stability and extensive documentation. Docker and Docker Compose will handle container orchestration, while either Nginx or Caddy will serve as your reverse proxy. You'll also need SSH key pairs for secure server access, and I recommend generating these with Ed25519 encryption rather than older RSA keys for better security and performance. Local network considerations are often overlooked but critical for success. Ensure your home router doesn't conflict with your VPN's IP range - if your home network uses 192.168.1.0/24, configure your VPN to use 10.0.0.0/24 or 172.16.0.0/24 to avoid routing conflicts. You'll also need to understand your local firewall configuration, as some restrictive networks block VPN protocols entirely.Understanding the Fundamentals
Modern VPN protocols have evolved significantly from older solutions like PPTP and L2TP, with WireGuard representing the current state-of-the-art for self-hosted deployments. WireGuard uses cutting-edge cryptography including ChaCha20 for symmetric encryption, Poly1305 for authentication, and Curve25519 for key exchange. This combination provides quantum-resistant security while maintaining exceptional performance - typically 3-5x faster than OpenVPN while using less CPU resources. The architecture of a self-hosted VPN differs fundamentally from commercial services. Instead of connecting to a shared server with hundreds of other users, your traffic routes through a dedicated instance that you control completely. This eliminates the privacy risks associated with shared infrastructure, such as traffic correlation attacks or data retention policies. Your VPN server acts as a secure tunnel endpoint, encrypting all traffic between your devices and the internet while appearing to websites as originating from your server's location. Understanding network address translation (NAT) and routing is crucial for troubleshooting and optimization. When you connect to your VPN, your device receives an IP address from your server's private subnet (typically 10.0.0.0/24). The VPN server then translates these private addresses to its public IP using iptables rules, effectively masking your real location and IP address. This process requires careful firewall configuration to ensure traffic flows correctly while maintaining security. Certificate management and public key infrastructure (PKI) form the foundation of VPN security. Unlike password-based authentication, modern VPNs use cryptographic key pairs where each device has a unique private key that never leaves the device and a corresponding public key stored on the server. This approach eliminates many attack vectors associated with password-based systems, such as brute force attacks or credential theft. The key exchange process happens automatically, but understanding the underlying cryptography helps with troubleshooting connection issues. DNS configuration deserves special attention because it's a common source of privacy leaks. Even with a perfectly configured VPN tunnel, your DNS queries might still route through your ISP's servers, revealing your browsing habits. A properly configured self-hosted VPN includes its own DNS resolver, typically using Unbound or Pi-hole, ensuring that all DNS queries are encrypted and routed through your VPN tunnel. This setup also enables ad-blocking and malware protection at the network level.Step-by-Step Guide
Begin your VPN server setup by securing your fresh VPS installation with essential security measures. After connecting via SSH using your private key, immediately update the system packages and configure a non-root user with sudo privileges. Create the user with `sudo adduser vpnadmin` and add them to the sudo group with `usermod -aG sudo vpnadmin`. Disable root login and password authentication by editing `/etc/ssh/sshd_config`, setting `PermitRootLogin no` and `PasswordAuthentication no`, then restart the SSH service with `systemctl restart sshd`. Install Docker and Docker Compose using the official installation method rather than distribution packages, which are often outdated. Download the Docker installation script with `curl -fsSL https://get.docker.com -o get-docker.sh` and run it with `sh get-docker.sh`. Add your user to the docker group with `sudo usermod -aG docker $USER` and log out and back in for the changes to take effect. Install Docker Compose with `sudo curl -L "https://github.com/docker/compose/releases/download/v2.20.0/docker-compose-$(uname -s)-$(uname -m)" -o /usr/local/bin/docker-compose` and make it executable with `sudo chmod +x /usr/local/bin/docker-compose`. Create your project directory structure with `mkdir -p ~/vpn-server/{wireguard,nginx,monitoring}` and navigate to the main directory. Your primary docker-compose.yml file will orchestrate multiple services for a complete VPN solution: ```yaml version: '3.8' services: wireguard: image: linuxserver/wireguard:latest container_name: wireguard cap_add: - NET_ADMIN - SYS_MODULE environment: - PUID=1000 - PGID=1000 - TZ=America/New_York - SERVERURL=vpn.yourdomain.com - SERVERPORT=51820 - PEERS=5 - PEERDNS=10.13.13.1 - INTERNAL_SUBNET=10.13.13.0 - ALLOWEDIPS=0.0.0.0/0 volumes: - ./wireguard/config:/config - /lib/modules:/lib/modules ports: - 51820:51820/udp sysctls: - net.ipv4.conf.all.src_valid_mark=1 restart: unless-stopped networks: - vpn_network nginx: image: nginx:alpine container_name: nginx ports: - "80:80" - "443:443" volumes: - ./nginx/nginx.conf:/etc/nginx/nginx.conf:ro - ./nginx/ssl:/etc/nginx/ssl:ro - ./nginx/logs:/var/log/nginx depends_on: - wireguard restart: unless-stopped networks: - vpn_network unbound: image: mvance/unbound:latest container_name: unbound volumes: - ./unbound:/opt/unbound/etc/unbound ports: - "53:53/tcp" - "53:53/udp" restart: unless-stopped networks: vpn_network: ipv4_address: 10.13.13.1 networks: vpn_network: driver: bridge ipam: config: - subnet: 10.13.13.0/24 ``` Configure your firewall rules before starting any services to prevent security gaps during the setup process. Ubuntu's UFW provides a user-friendly interface for iptables configuration. Enable UFW with `sudo ufw enable` and configure the basic rules: `sudo ufw default deny incoming`, `sudo ufw default allow outgoing`, and `sudo ufw allow ssh`. Add specific rules for your VPN with `sudo ufw allow 51820/udp` for WireGuard and `sudo ufw allow 80,443/tcp` for the web interface. The WireGuard configuration requires careful attention to routing and DNS settings. After starting your containers with `docker-compose up -d`, examine the generated peer configurations in `./wireguard/config/peer1/peer1.conf`. These configurations contain the private keys and connection parameters for each client device. The server automatically generates QR codes for mobile device setup, accessible in the peer directories as PNG files.
⚠️ Warning: Never share or expose WireGuard private keys. Each peer configuration contains sensitive cryptographic material that, if compromised, allows complete access to your VPN tunnel. Store these files securely and delete any copies from unsecured locations.
Test your initial VPN connection before proceeding with advanced configuration. Download the peer configuration to your local device and import it into your WireGuard client. Verify that you can establish a connection and that your public IP address changes to your server's IP. Check for DNS leaks using tools like dnsleaktest.com to ensure your DNS queries are routing through your VPN server rather than your local ISP.
Docker and Container Management
Docker containerization provides isolation, easy updates, and simplified backup procedures for your VPN infrastructure. The LinuxServer.io WireGuard image handles most configuration automatically, but understanding the underlying container architecture helps with customization and troubleshooting. The container requires elevated privileges (NET_ADMIN and SYS_MODULE capabilities) to manage network interfaces and load kernel modules, which is why proper host security becomes even more critical. Container networking for VPN services requires careful planning to avoid conflicts and ensure proper traffic flow. The custom bridge network defined in your docker-compose.yml creates an isolated environment where containers can communicate using predictable IP addresses. The Unbound DNS resolver receives a static IP (10.13.13.1) that matches the PEERDNS setting in WireGuard, ensuring consistent DNS resolution for VPN clients. Volume management ensures your VPN configurations persist across container updates and reboots. The WireGuard container stores all configuration files, peer certificates, and logs in the `./wireguard/config` directory on your host system. This approach allows you to update the container image without losing your carefully configured peer settings. I recommend implementing a regular backup strategy for this directory, as it contains all the cryptographic material necessary to rebuild your VPN server.
💡 Pro Tip: Use Docker's logging drivers to centralize log management. Add `logging: {driver: "json-file", options: {max-size: "10m", max-file: "3"}}` to each service to prevent log files from consuming excessive disk space over time.
Container health monitoring helps detect issues before they impact your VPN connectivity. Implement health checks in your docker-compose.yml by adding health check commands that verify WireGuard's operational status. For the WireGuard container, a simple health check might test whether the network interface exists and has the correct IP configuration. These health checks integrate with monitoring solutions and can trigger automatic container restarts when problems are detected.
Resource limits prevent any single container from overwhelming your VPS, which is particularly important on smaller instances. Add memory and CPU limits to your container definitions using the `deploy.resources.limits` section. For a typical personal VPN setup, limiting WireGuard to 512MB RAM and 0.5 CPU cores provides ample resources while ensuring system stability. Monitor actual resource usage with `docker stats` to fine-tune these limits based on your specific usage patterns.
Reverse Proxy Configuration and SSL Automation
A reverse proxy serves multiple critical functions in your VPN infrastructure: SSL termination, traffic routing, and providing a web interface for monitoring and management. Nginx offers maximum flexibility and performance, while Caddy provides automatic SSL certificate management with minimal configuration. Both approaches have merit, and I'll provide configurations for each to help you choose based on your comfort level with manual certificate management. For Nginx configuration, create a comprehensive nginx.conf file that handles SSL termination, security headers, and traffic routing. Your configuration should include modern TLS settings, HSTS headers, and proper logging for security monitoring: ```nginx events { worker_connections 1024; } http { include /etc/nginx/mime.types; default_type application/octet-stream; # Security headers add_header X-Frame-Options DENY; add_header X-Content-Type-Options nosniff; add_header X-XSS-Protection "1; mode=block"; add_header Strict-Transport-Security "max-age=31536000; includeSubDomains" always; # SSL configuration ssl_protocols TLSv1.2 TLSv1.3; ssl_ciphers ECDHE-RSA-AES256-GCM-SHA512:DHE-RSA-AES256-GCM-SHA512:ECDHE-RSA-AES256-GCM-SHA384:DHE-RSA-AES256-GCM-SHA384; ssl_prefer_server_ciphers off; ssl_session_cache shared:SSL:10m; ssl_session_timeout 10m; server { listen 80; server_name vpn.yourdomain.com; return 301 https://$server_name$request_uri; } server { listen 443 ssl http2; server_name vpn.yourdomain.com; ssl_certificate /etc/nginx/ssl/fullchain.pem; ssl_certificate_key /etc/nginx/ssl/privkey.pem; location / { proxy_pass http://wireguard:51821; proxy_set_header Host $host; proxy_set_header X-Real-IP $remote_addr; proxy_set_header X-Forwarded-For $proxy_add_x_forwarded_for; proxy_set_header X-Forwarded-Proto $scheme; } location /health { access_log off; return 200 "healthy\n"; add_header Content-Type text/plain; } } } ``` Caddy offers a more streamlined approach with automatic HTTPS and certificate management. Create a Caddyfile that handles SSL certificates automatically through Let's Encrypt integration. Caddy's automatic HTTPS feature eliminates the complexity of certificate renewal scripts and provides zero-downtime certificate updates: ``` vpn.yourdomain.com { reverse_proxy wireguard:51821 header { Strict-Transport-Security "max-age=31536000; includeSubDomains" X-Content-Type-Options nosniff X-Frame-Options DENY X-XSS-Protection "1; mode=block" } log { output file /var/log/caddy/access.log { roll_size 100MB roll_keep 5 } } } ``` SSL certificate automation prevents the common problem of expired certificates breaking VPN access. If using Nginx, implement certbot with automatic renewal using systemd timers. Install certbot with `sudo apt install certbot python3-certbot-nginx` and obtain your initial certificate with `sudo certbot --nginx -d vpn.yourdomain.com`. Create a renewal timer by adding a systemd service file that runs certbot twice daily and reloads Nginx when certificates are updated.
⚠️ Warning: Let's Encrypt has rate limits of 50 certificates per registered domain per week. Avoid repeatedly requesting certificates during testing by using their staging environment first, then switching to production once your configuration is stable.
Rate limiting and DDoS protection become important as your VPN server is exposed to the internet. Configure Nginx or Caddy to limit connection rates and implement fail2ban to automatically block IP addresses that attempt brute force attacks. For Nginx, add rate limiting with `limit_req_zone $binary_remote_addr zone=vpn:10m rate=10r/m;` in the http block and `limit_req zone=vpn burst=5 nodelay;` in your server block.
Firewall Security and Network Hardening
Implementing robust firewall rules forms the cornerstone of your VPN server's security posture. UFW provides an accessible interface to iptables, but understanding the underlying iptables rules helps with advanced configuration and troubleshooting. Your firewall strategy should follow the principle of least privilege - deny all traffic by default and explicitly allow only necessary connections. Start with a comprehensive UFW configuration that covers all aspects of your VPN server. Beyond the basic rules mentioned earlier, implement application-specific profiles and logging for security monitoring. Create a custom UFW application profile for WireGuard by adding a file `/etc/ufw/applications.d/wireguard` with the appropriate port definitions. Enable connection logging with `sudo ufw logging on` to track connection attempts and potential security threats. Advanced iptables rules provide granular control over traffic flow and can implement features like traffic shaping or geographic blocking. While UFW handles basic firewall needs, direct iptables manipulation enables sophisticated routing policies. For example, you might want to route different VPN peers through different network interfaces or implement split-tunneling for specific applications: ```bash # Enable IP forwarding echo 'net.ipv4.ip_forward=1' | sudo tee -a /etc/sysctl.conf echo 'net.ipv6.conf.all.forwarding=1' | sudo tee -a /etc/sysctl.conf # WireGuard iptables rules iptables -A INPUT -m conntrack --ctstate RELATED,ESTABLISHED -j ACCEPT iptables -A FORWARD -m conntrack --ctstate RELATED,ESTABLISHED -j ACCEPT iptables -A FORWARD -i wg0 -o eth0 -j ACCEPT iptables -A FORWARD -i eth0 -o wg0 -j ACCEPT iptables -t nat -A POSTROUTING -o eth0 -j MASQUERADE ``` Network intrusion detection adds another layer of security monitoring to identify potential attacks or unauthorized access attempts. Install and configure fail2ban to automatically block IP addresses that exhibit suspicious behavior. Create custom fail2ban filters for WireGuard logs to detect brute force attempts against your VPN endpoint. Configure fail2ban to monitor SSH, Nginx, and WireGuard logs simultaneously, implementing progressive ban times that increase with repeated offenses. Port security extends beyond simply closing unused ports to include techniques like port knocking or VPN-only access for administrative services. Consider moving your SSH port from the default 22 to a non-standard port, though this provides only minimal security improvement. More effective is restricting SSH access to VPN-connected clients only, ensuring that administrative access requires both VPN authentication and SSH key authentication.
💡 Pro Tip: Implement geographic IP blocking using ipset and iptables to automatically reject connections from countries where you don't expect legitimate traffic. This significantly reduces log noise and potential attack vectors while requiring minimal maintenance.
IPv6 configuration requires special attention because many VPS providers assign IPv6 addresses by default, potentially creating security gaps if not properly configured. Either fully implement IPv6 support in your VPN configuration or completely disable IPv6 to avoid partial connectivity issues. If your VPS has IPv6 connectivity, extend your WireGuard configuration to include IPv6 routing and update your firewall rules accordingly.
Advanced VPN Configuration and Optimization
WireGuard's performance characteristics make it ideal for self-hosted deployments, but proper tuning can significantly improve connection speeds and reliability. The default MTU size of 1420 bytes works for most networks, but you can optimize this based on your specific network path. Use ping tests with different packet sizes to determine the optimal MTU: `ping -M do -s 1472 vpn.yourdomain.com` and reduce the size until packets stop fragmenting, then subtract 28 bytes for WireGuard overhead. Quality of Service (QoS) configuration helps maintain consistent performance when multiple devices share your VPN connection. Implement traffic shaping using tc (traffic control) to prioritize interactive traffic over bulk downloads. This becomes particularly important if you're using your VPN for real-time applications like video calls or online gaming while simultaneously running background downloads or backups. Split tunneling configuration allows selective routing of traffic through your VPN while maintaining direct connections for local services. This advanced feature requires careful routing table manipulation but can significantly improve performance for services that don't require VPN protection. Configure split tunneling by modifying the AllowedIPs setting in client configurations to exclude local network ranges and specific public services. DNS over HTTPS (DoH) or DNS over TLS (DoT) adds an additional layer of privacy to your DNS resolution. Configure Unbound to forward queries to privacy-focused DNS providers using encrypted protocols. This setup ensures that even if your VPN traffic is intercepted, DNS queries remain encrypted and private. Popular DoH providers include Cloudflare (1.1.1.1), Quad9 (9.9.9.9), and AdGuard DNS (94.140.14.14). ```bash # Unbound configuration for DoH server: interface: 0.0.0.0 port: 53 do-ip4: yes do-ip6: no do-udp: yes do-tcp: yes access-control: 10.13.13.0/24 allow forward-zone: name: "." forward-tls-upstream: yes forward-addr: 1.1.1.1@853#cloudflare-dns.com forward-addr: 1.0.0.1@853#cloudflare-dns.com ``` Multi-hop VPN configurations provide additional privacy by routing traffic through multiple servers, though this significantly increases latency and complexity. If you require this level of protection, consider setting up multiple VPS instances in different jurisdictions and chaining them together. This approach requires careful routing configuration and increases your monthly costs proportionally to the number of hops.Monitoring, Logging, and Maintenance
Comprehensive monitoring ensures your VPN server remains operational and secure while providing insights into usage patterns and potential issues. Implement a multi-layered monitoring approach that covers system resources, network connectivity, and application-specific metrics. Prometheus and Grafana provide enterprise-grade monitoring capabilities that integrate well with Docker environments and offer extensive customization options. System-level monitoring should track CPU usage, memory consumption, disk space, and network throughput. Install node_exporter as a Docker container to expose system metrics in Prometheus format. Monitor disk space particularly carefully, as log files and container images can consume significant storage over time. Set up alerts for disk usage above 80% and implement log rotation policies to prevent storage exhaustion. Network connectivity monitoring verifies that your VPN server remains accessible from external networks and that tunneled traffic flows correctly. Implement automated tests that connect to your VPN from external locations and verify that traffic routes properly. Use tools like speedtest-cli to monitor bandwidth performance and detect degradation over time. Set up alerts for connection failures or significant performance drops. WireGuard-specific monitoring provides insights into peer connections, bandwidth usage, and protocol-level issues. The wg command provides real-time statistics about connected peers, including last handshake times and transferred data volumes. Parse this information regularly to detect inactive peers or unusual usage patterns that might indicate compromised credentials: ```bash #!/bin/bash # WireGuard monitoring script INTERFACE="wg0" PEERS=$(wg show $INTERFACE peers) for peer in $PEERS; do HANDSHAKE=$(wg show $INTERFACE latest-handshakes | grep $peer | awk '{print $2}') CURRENT_TIME=$(date +%s) TIME_DIFF=$((CURRENT_TIME - HANDSHAKE)) if [ $TIME_DIFF -gt 300 ]; then echo "Warning: Peer $peer last handshake was $TIME_DIFF seconds ago" fi done ``` Log aggregation and analysis help identify security threats and troubleshoot connectivity issues. Configure centralized logging using the ELK stack (Elasticsearch, Logstash, Kibana) or a simpler solution like Loki and Grafana. Collect logs from WireGuard, Nginx, system authentication, and firewall events to create a comprehensive security monitoring dashboard. Implement automated analysis rules that flag suspicious patterns like repeated connection attempts from unusual locations or excessive bandwidth usage.
💡 Pro Tip: Set up a simple uptime monitoring service like UptimeRobot or StatusCake to monitor your VPN server from external locations. These services can alert you to outages even when your server's internal monitoring is unavailable.
Automated maintenance procedures reduce the operational burden of maintaining your VPN server while ensuring security updates are applied promptly. Create scripts that handle routine tasks like certificate renewal, container updates, and log rotation. Schedule these scripts using cron jobs with appropriate timing to minimize service disruption. For example, schedule container updates during low-usage periods and implement graceful restart procedures that maintain existing connections when possible.
Backup and Disaster Recovery
Implementing robust backup procedures protects against data loss and enables rapid recovery from server failures or security incidents. Your backup strategy should cover configuration files, cryptographic keys, and monitoring data while ensuring that backups themselves don't create security vulnerabilities. The most critical data includes WireGuard peer configurations, SSL certificates, and custom configuration files. Local backups provide quick recovery options but don't protect against server-level failures or data center issues. Create automated scripts that compress and encrypt your configuration directories daily, storing them in a separate location on your VPS. Use tools like tar and gpg to create encrypted archives: `tar czf - /home/vpnadmin/vpn-server | gpg --cipher-algo AES256 --compress-algo 1 --symmetric --output vpn-backup-$(date +%Y%m%d).tar.gz.gpg`. Store the encryption passphrase securely, separate from your server. Remote backups ensure recovery capability even if your entire VPS becomes unavailable. Implement automated uploads to cloud storage services like AWS S3, Google Cloud Storage, or privacy-focused alternatives like Backblaze B2. Configure your backup script to upload encrypted archives automatically while implementing retention policies that balance storage costs with recovery requirements. Keep at least 30 days of daily backups and 12 months of weekly backups. Database and state backup considerations apply to monitoring data and logs that might contain valuable security information. If you've implemented Prometheus monitoring, backup the time-series database regularly to preserve historical performance and security data. This information proves invaluable for forensic analysis if security incidents occur and helps identify performance trends over time. Disaster recovery testing validates that your backup procedures actually work when needed. Schedule quarterly recovery tests where you rebuild your VPN server from backups on a test VPS instance. Document the recovery process step-by-step and time how long complete restoration takes. This testing often reveals gaps in backup procedures or missing configuration files that aren't immediately obvious during normal operation.
⚠️ Warning: Never store backup encryption keys on the same server as your backups. If an attacker compromises your server, they could access both your encrypted backups and the keys to decrypt them, negating the security benefits of encryption.
Version control for configuration files provides additional protection against configuration errors and enables easy rollback of changes. Initialize a git repository in your VPN server directory and commit configuration changes regularly. Use meaningful commit messages that describe what changes were made and why. This approach also facilitates collaboration if multiple people manage your VPN infrastructure.
Security Hardening and Best Practices
Security hardening transforms your basic VPN server into a robust, attack-resistant system that can withstand sophisticated threats. Start with operating system hardening by disabling unnecessary services, implementing mandatory access controls, and configuring audit logging. Ubuntu's landscape-security package provides automated security update installation, while unattended-upgrades ensures critical patches are applied promptly without manual intervention. Kernel parameter tuning enhances both security and performance for VPN workloads. Modify `/etc/sysctl.conf` to include security-focused network parameters that prevent common attack vectors. Disable IP source routing with `net.ipv4.conf.all.accept_source_route = 0`, prevent ICMP redirect acceptance with `net.ipv4.conf.all.accept_redirects = 0`, and enable SYN flood protection with `net.ipv4.tcp_syncookies = 1`. These changes require a reboot or `sysctl -p` to take effect. Container security extends beyond basic Docker configuration to include image verification, security scanning, and runtime protection. Use only official images or images from trusted sources like LinuxServer.io, and verify image signatures when possible. Implement regular security scanning of your container images using tools like Trivy or Clair to identify known vulnerabilities in base images and dependencies. Key management practices prevent the most common security failures in self-hosted VPN deployments. Generate strong WireGuard keys using the official tools rather than third-party generators, and store private keys with appropriate file permissions (600 or 400). Implement key rotation policies for long-term deployments, though WireGuard's forward secrecy means that compromised keys don't expose historical traffic. Access control mechanisms should extend beyond VPN authentication to include administrative access and monitoring interfaces. Implement SSH key rotation policies, use sudo logging to track administrative actions, and consider implementing two-factor authentication for SSH access using tools like Google Authenticator or hardware tokens. For the web interface, implement strong authentication and consider restricting access to VPN-connected clients only. Network segmentation isolates your VPN infrastructure from other services and limits the impact of potential compromises. If running multiple services on your VPS, use Docker networks or VLANs to separate VPN traffic from other applications. This approach prevents lateral movement if one service becomes compromised and enables more granular firewall rules.
💡 Pro Tip: Implement a security checklist that you review monthly, covering tasks like reviewing logs for suspicious activity, updating container images, verifying backup integrity, and testing disaster recovery procedures. Consistent security maintenance prevents small issues from becoming major vulnerabilities.
Intrusion detection systems (IDS) provide real-time monitoring for malicious activity and can automatically respond to detected threats. OSSEC or Suricata offer comprehensive intrusion detection capabilities that integrate well with self-hosted infrastructure. Configure these tools to monitor file integrity, detect unusual network patterns, and alert you to potential security incidents via email or messaging platforms.
Performance Optimization and Scaling
VPN performance optimization involves multiple layers, from kernel networking parameters to application-specific tuning. WireGuard's efficiency means that CPU rarely becomes a bottleneck, but network throughput and latency optimization can significantly improve user experience. Start by optimizing your VPS's network stack using kernel parameters that increase buffer sizes and improve packet processing efficiency. Bandwidth management ensures fair resource allocation when multiple devices share your VPN connection. Implement Quality of Service (QoS) rules using tc (traffic control) to prioritize interactive traffic over bulk transfers. This configuration becomes crucial when family members or team members share the same VPN server, as one person's large download shouldn't impact others' video calls or web browsing. Connection optimization focuses on reducing latency and improving throughput for your specific use cases. WireGuard's UDP-based protocol performs better than TCP-based VPNs, but you can further optimize by tuning kernel networking parameters. Increase the network buffer sizes with `net.core.rmem_max = 16777216` and `net.core.wmem_max = 16777216` in `/etc/sysctl.conf`. These changes particularly benefit high-bandwidth applications like video streaming or file transfers. Geographic optimization involves choosing the right server location and implementing content delivery strategies. If you frequently access content from multiple regions, consider deploying multiple VPN servers in different locations and configuring your clients to connect to the optimal server automatically. This approach requires more complex management but provides the best possible performance for global users. Load balancing becomes relevant for family or small business deployments where multiple users share the VPN infrastructure. While a single WireGuard instance can handle dozens of concurrent connections, distributing load across multiple containers or servers improves reliability and performance. Implement load balancing using Nginx upstream configurations or dedicated load balancers like HAProxy. Caching strategies can improve performance for frequently accessed content while maintaining privacy. Configure your DNS resolver to cache responses aggressively, reducing lookup times for repeated queries. Consider implementing a transparent proxy with caching for HTTP traffic, though this requires careful configuration to avoid breaking HTTPS connections or creating privacy leaks.Common Mistakes to Avoid
DNS leaks represent the most common privacy failure in self-hosted VPN deployments, often occurring when clients fall back to local DNS servers during connectivity issues. Prevent DNS leaks by configuring your WireGuard clients to use only your VPN server's DNS resolver and implementing DNS blocking rules that prevent queries from bypassing your VPN tunnel. Test for DNS leaks regularly using online tools and from different network locations to ensure consistent protection. Firewall misconfigurations can either block legitimate VPN traffic or inadvertently expose sensitive services to the internet. A common mistake is forgetting to enable IP forwarding in the kernel, which prevents VPN traffic from routing correctly to the internet. Another frequent error is implementing overly restrictive iptables rules that block return traffic, causing connections to establish but fail during data transfer. Always test firewall changes thoroughly before implementing them in production. Certificate and key management errors can compromise your entire VPN security model. Never generate WireGuard keys on shared systems or transmit private keys over unencrypted channels. Avoid using the same key pair across multiple devices, as this eliminates the ability to revoke access for individual devices. When sharing peer configurations, use secure channels like encrypted email or password-protected archives rather than plain text messages or file sharing services.
⚠️ Warning: Don't route all traffic through your VPN if your server has limited bandwidth or is geographically distant from your location. This can severely impact performance for local services and may violate your VPS provider's terms of service if you exceed bandwidth limits.
Update management mistakes can introduce security vulnerabilities or break working configurations. Avoid updating all components simultaneously without testing, as this makes it difficult to identify which change caused problems. Instead, implement staged updates where you test each component individually in a development environment before applying changes to production. Maintain rollback procedures for each type of update, including container image versions, system packages, and configuration files.
Resource allocation errors often surface only under load, causing performance degradation or service outages during peak usage. Monitor your VPS resource usage over time to understand normal patterns and identify when upgrades become necessary. Don't assume that minimal resource allocation will suffice - VPN servers can experience sudden load spikes during network events or when users change their usage patterns.
Backup verification failures mean that your carefully maintained backups might not actually restore when needed. Many administrators create backup scripts but never test the restoration process, only discovering problems during actual emergencies. Implement automated backup testing that verifies archive integrity and occasionally performs test restorations to validate that your backup procedures work correctly.
Testing and Verification
Comprehensive testing validates that your VPN server provides the security and privacy protections you expect while maintaining acceptable performance characteristics. Begin with basic connectivity testing by establishing VPN connections from multiple device types and network locations. Verify that your public IP address changes correctly and that all internet traffic routes through your VPN server rather than your local network. DNS leak testing requires checking multiple scenarios beyond simple web-based tests. Use command-line tools like nslookup and dig to verify that DNS queries route through your VPN server's resolver. Test DNS resolution from different applications and during various network conditions, including immediately after connecting and during network transitions. Some applications cache DNS responses or use hardcoded DNS servers, potentially bypassing your VPN's DNS configuration. Performance benchmarking establishes baseline metrics for your VPN server and helps identify degradation over time. Conduct speed tests from multiple geographic locations and at different times of day to understand your server's performance characteristics. Use tools like iperf3 to test raw network throughput between your devices and VPN server, eliminating variables introduced by internet routing and third-party speed test services. Security validation involves testing your server's resistance to common attack vectors and verifying that security controls function as designed. Use tools like nmap to scan your server from external networks, ensuring that only intended ports are accessible. Test fail2ban configuration by intentionally triggering security rules and verifying that blocking occurs correctly. Verify that your firewall rules prevent unauthorized access while allowing legitimate VPN traffic. ```bash # Comprehensive VPN testing script #!/bin/bash echo "Testing VPN connectivity and security..." # Test 1: Verify VPN interface exists if ip addr show wg0 &>/dev/null; then echo "✓ WireGuard interface active" else echo "✗ WireGuard interface not found" exit 1 fi # Test 2: Check peer connections CONNECTED_PEERS=$(wg show wg0 peers | wc -l) echo "✓ $CONNECTED_PEERS peers configured" # Test 3: Verify DNS resolution if nslookup google.com 10.13.13.1 &>/dev/null; then echo "✓ DNS resolution working" else echo "✗ DNS resolution failed" fi # Test 4: Check external IP EXTERNAL_IP=$(curl -s ifconfig.me) echo "✓ External IP: $EXTERNAL_IP" ``` Application-specific testing ensures that your VPN works correctly with the software and services you use regularly. Test streaming services, online banking, and other applications that might implement VPN detection or blocking. Some services block VPS IP ranges entirely, which could limit your VPN's usefulness for certain applications. Document any compatibility issues and consider implementing multiple exit points if needed.
💡 Pro Tip: Create automated testing scripts that run daily and alert you to connectivity issues before you notice them manually. Include tests for DNS resolution, external IP verification, and basic connectivity to common services.
Load testing validates that your VPN server can handle your expected usage patterns without performance degradation. Use multiple devices to establish simultaneous connections and transfer data concurrently. Monitor server resources during these tests to identify bottlenecks and determine your server's practical capacity limits. This testing helps you understand when you'll need to upgrade your VPS or implement load balancing.
Troubleshooting Guide
VPN connectivity issues often stem from network routing problems, firewall misconfigurations, or DNS resolution failures. When clients cannot establish connections, start by verifying that your WireGuard service is running and listening on the correct port using `netstat -ulnp | grep 51820`. Check that your firewall allows UDP traffic on port 51820 and that your VPS provider hasn't implemented additional firewall rules that block VPN protocols. Handshake failures typically indicate clock synchronization issues, firewall problems, or incorrect peer configurations. WireGuard requires accurate time synchronization between clients and servers, so verify that your server's clock is correct using `timedatectl status`. If handshakes fail intermittently, check for NAT traversal issues, particularly if clients connect from networks with strict firewall policies or carrier-grade NAT. DNS resolution problems manifest as websites failing to load despite successful VPN connections. Verify that your Unbound DNS resolver is running and accessible from VPN clients using `dig @10.13.13.1 google.com`. Check that your WireGuard peer configurations specify the correct DNS server and that clients actually use these settings rather than falling back to local DNS servers. Performance issues require systematic investigation to identify bottlenecks in your network path. Use tools like mtr (my traceroute) to analyze network latency and packet loss between your client and server. Monitor server CPU and memory usage during performance problems to determine whether the bottleneck is computational or network-related. Consider that some VPS providers implement traffic shaping that can affect VPN performance during peak hours. ```bash # Comprehensive troubleshooting script #!/bin/bash echo "VPN Server Diagnostic Report" echo "============================" echo -e "\n1. WireGuard Status:" systemctl is-active docker docker ps --filter "name=wireguard" --format "table {{.Names}}\t{{.Status}}\t{{.Ports}}" echo -e "\n2. Network Configuration:" ip addr show wg0 2>/dev/null || echo "WireGuard interface not found" echo -e "\n3. Firewall Status:" ufw status numbered echo -e "\n4. Recent Connection Attempts:" journalctl -u docker -f --since "1 hour ago" | grep wireguard | tail -10 echo -e "\n5. System Resources:" free -h df -h / ``` Certificate and SSL issues can prevent web interface access and monitoring functionality. When SSL certificates expire or become invalid, clients may show security warnings or refuse to connect entirely. Use `openssl x509 -in /path/to/certificate -text -noout` to check certificate validity dates and ensure that automatic renewal is working correctly. Verify that your domain's DNS records point to your server's IP address and that Let's Encrypt can reach your server for validation. Container-related problems often involve resource constraints, networking issues, or persistent volume problems. Use `docker logs wireguard` to examine container logs for error messages or warnings. Check that containers have sufficient memory allocation and that Docker's networking doesn't conflict with your host system's network configuration. Persistent volume issues can cause configuration loss or prevent containers from starting correctly.
💡 Pro Tip: Keep a troubleshooting log that documents problems you encounter and their solutions. VPN issues often repeat, and having your own reference guide saves significant time during future troubleshooting sessions.
Client-side troubleshooting requires understanding how different operating systems and WireGuard clients handle VPN connections. Windows clients might require additional configuration for DNS settings, while mobile clients could have power management features that interfere with VPN connectivity. Maintain test configurations for different client types and document platform-specific quirks that affect connectivity or performance.
🖥️ Recommended VPS: ScalaHosting
After testing multiple VPS providers for self-hosting, ScalaHosting's Self-Managed Cloud VPS consistently delivers the best experience. KVM virtualization means full Docker compatibility, included snapshots for easy backups, and unmetered bandwidth so you won't get surprise bills.
Build #1 plan ($29.95/mo) with 2 CPU cores, 4 GB RAM, and 50 GB SSD handles most self-hosted setups with room to spare.
[GET_SCALAHOSTING_VPS]Full root access • KVM virtualization • Free snapshots • Unmetered bandwidth

⚡ Open-Source Quick Deploy Projects
Looking for one-click self-hosting setups? These projects work great on a ScalaHosting VPS:
- OneShot Matrix — One-click Matrix/Stoat chat server (Discord alternative)
- SelfHostHytale — One-click Hytale game server deployment
Frequently Asked Questions
**How much does self-hosting a VPN server actually cost compared to commercial services?** The total cost of ownership for a self-hosted VPN includes VPS hosting ($5-15/month), domain registration ($10-15/year), and your time investment for setup and maintenance. Over two years, this typically costs $150-400 compared to $120-300 for commercial VPN services. However, self-hosting provides dedicated resources and complete privacy control, making the slight cost premium worthwhile for privacy-conscious users. **Can I use my home internet connection instead of a VPS for hosting?** While technically possible, hosting a VPN server on your home connection creates several significant challenges. Most residential ISPs block incoming connections on VPN ports, assign dynamic IP addresses that change frequently, and have upload bandwidth limitations that severely impact performance. Additionally, hosting from home doesn't provide the geographic flexibility that makes VPNs useful for bypassing regional restrictions. **How many simultaneous connections can my VPN server handle?** A typical $10/month VPS can comfortably handle 10-20 simultaneous connections for normal web browsing and streaming. The limiting factors are usually bandwidth rather than CPU or memory, as WireGuard is extremely efficient. Each 1080p video stream consumes approximately 5-8 Mbps, so a VPS with 1 Gbps bandwidth could theoretically support 100+ streams, though practical limits are lower due to other overhead and usage patterns. **What happens if my VPS provider goes out of business or suspends my account?** This scenario highlights the importance of maintaining current backups and documentation. With proper backups, you can migrate to a new provider within 2-4 hours by restoring your configuration on a new VPS and updating your DNS records. Keep a list of alternative VPS providers and maintain backups in multiple locations to ensure rapid recovery from provider-related issues. **Is self-hosting more secure than commercial VPN providers?** Self-hosting eliminates third-party trust requirements but shifts security responsibility to you. Commercial providers have dedicated security teams and enterprise-grade infrastructure, while self-hosting requires you to handle security updates, monitoring, and incident response. For users with strong technical skills, self-hosting typically provides better security, while less technical users might be more secure with reputable commercial providers. **How do I handle software updates without breaking my VPN service?** Implement a staged update process where you test updates in a development environment before applying them to production. For Docker containers, pin specific image versions in your docker-compose.yml file and update them manually after testing. Schedule updates during low-usage periods and maintain rollback procedures for each component. System updates can usually be automated using unattended-upgrades, but monitor the server carefully after automatic updates. **Can I use my VPN server for other services like web hosting or file storage?** While possible, mixing VPN services with other applications increases complexity and potential security risks. If you choose to run multiple services, implement proper network segmentation using Docker networks or VLANs. Ensure that additional services don't interfere with VPN performance and that security policies account for the increased attack surface of multiple applications.🔐 Secure Your Self-Hosted Setup with NordVPN
Meshnet creates free encrypted tunnels between your devices. Static IP option for reliable remote access to your servers. Threat Protection blocks malicious connections. Perfect for accessing your home lab securely from anywhere.
30-day money-back guarantee • No questions asked